• Skip to main content
SIMPLY STYLED and WELL SEASONED

My Favorite Fall Finds for October

Oct 6, 2025 · Leave a Comment

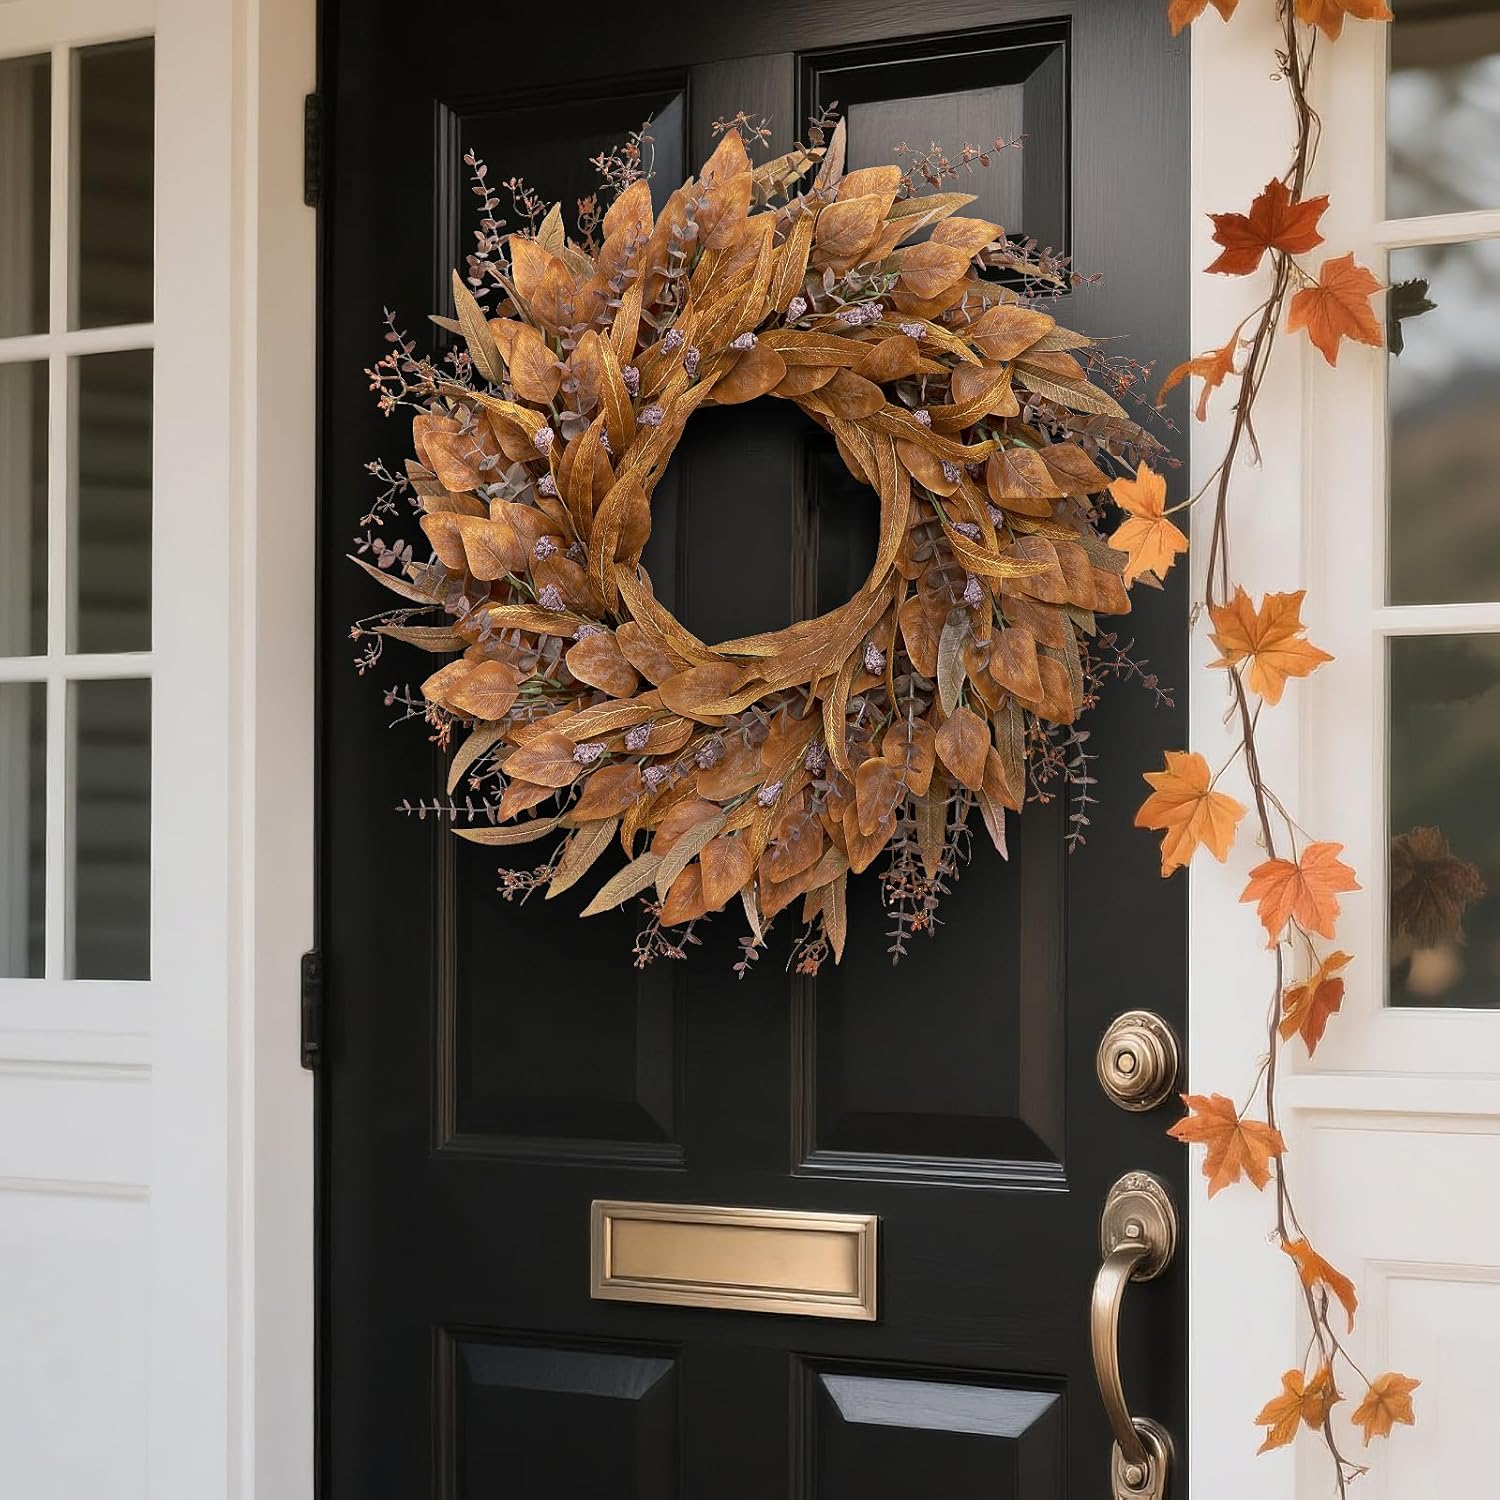
Fall wreath on a front door

My Favorite Fall Finds for October

October is here — and I’m fully embracing everything cozy, colorful, and pumpkin-spiced! The air is crisp, the leaves are turning, and it’s officially time to layer up, decorate the house, and fill it with all the warm scents of fall.

Every fall, I love gathering a few favorite finds that make this season feel extra special — from a cozy fall outfit and warm drinks to candles, home decor, and comfort food. If you’re ready to soak in all things autumn, here are my October favorites that bring warmth and charm to every corner of your home.


1. My Go-To Cozy Fall Outfit

Fall fashion is all about layering, texture, and comfort. This month, I’m living in:

  • A chunky knit sweater in cream, camel, or rust

  • High-waisted jeans with a relaxed fit & slight crop to show off your boots.

  • Soft suede ankle boots

Whether you’re heading to the pumpkin patch, hosting friends, or running errands, this outfit keeps you comfy while still looking put-together.


2. Fall Home Decor Refresh

Nothing transforms your space quite like a little fall decor! This October, I’ve leaned into warm tones and natural textures — cozy but not cluttered.

Here’s what I’ve been loving:

  • Throw blankets in deep rust, caramel, or olive green.
  • Woven baskets for storing blankets or pumpkins by the fireplace.
  • Textured pillows — think plaid, cable knit, or chenille. I love layering with a varitey of textures and prints.
  • Mini pumpkins scattered across the dining table and entryway.
  • Mini white pumpkins on shelves and mantels.
  • Brass or gold accents for a touch of shine.
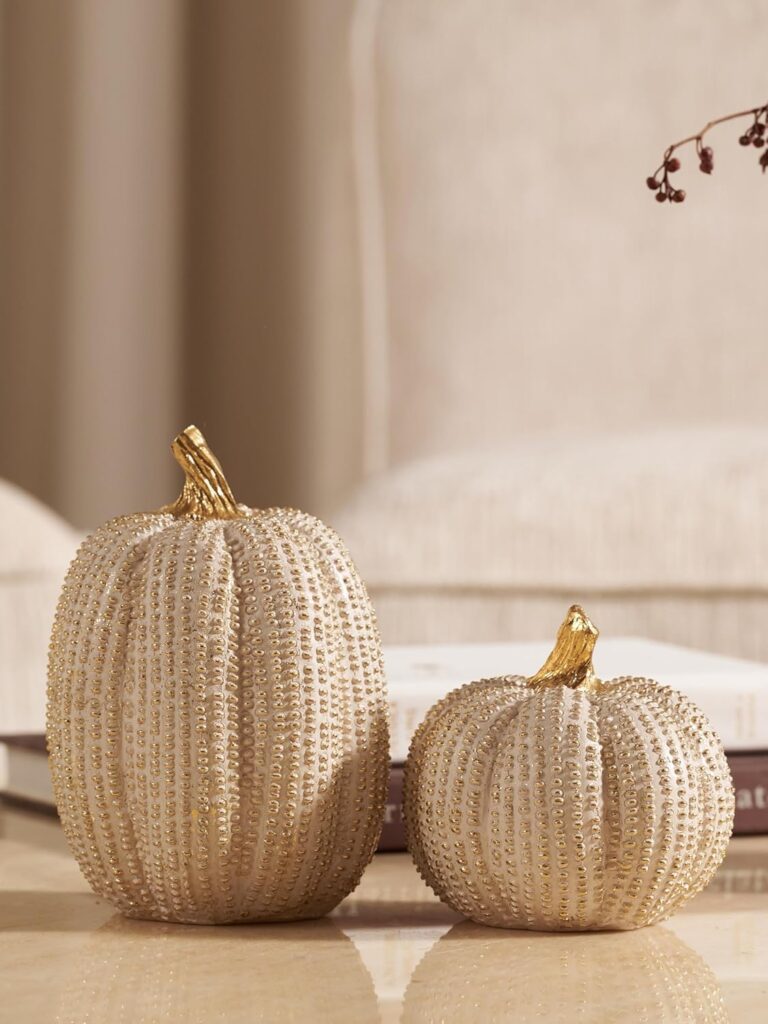
Even just swapping out your pillow covers and adding a few fall stems in a vase can instantly make your space feel seasonal and welcoming.


3. Candles That Smell Like Fall

Is it even October without a cozy candle burning? Nothing sets the mood quite like the flicker of a fall candle. This month, I’ve been burning scents that make my home smell warm and inviting:

  • Pumpkin Spice – warm, spicy, and comforting
  • Vanilla Bourbon – rich, smooth, and perfect for chilly nights
  • Mulled Cider – bright and nostalgic, like a trip to the orchard
  • Fall Leaves – earthy and comforting
  • Apple Cider Donut – nostalgic and delicious
  • Cozy Season – perfect for chilly evenings with a blanket and book

Place one in your entryway or living room, and your whole home instantly feels inviting.


4. A Gorgeous Fall Wreath for the Front Door

A seasonal wreath instantly says “welcome fall!” This year, I fell in love with one made to look like eucalyptus and eucalyptus fruit & seeds — simple, natural, and perfect for transitioning through Thanksgiving.

If you’re into DIY, you can create your own using:

  • A grapevine wreath base
  • Faux fall foliage (maple leaves, berries, eucalyptus)
  • Mini pumpkins or pinecones for texture
  • Burlap or velvet ribbon to finish

Hang it on your front door or above the mantle for instant autumn charm.


5. Warm Drinks & Cozy Coffee Favorites

Cool October mornings call for something warm in your mug. Whether you’re sipping by the fire or starting your workday, these drinks bring the essence of fall straight to your cup:

Homemade Favorites:

  • Pumpkin Spice Latte – made with real pumpkin purée and a sprinkle of cinnamon.
  • Maple Cinnamon Latte – a touch of maple syrup adds rich, cozy sweetness.
  • Apple Cider Chai – a mix of spiced tea and warm cider for a comforting twist.
  • Hot Cocoa with Sea Salt & Caramel – perfect for evening movie nights.

If you’re a coffee lover, try adding:

  • A dash of pumpkin pie spice to your morning brew.
  • A cinnamon stick for natural flavor and fragrance.
  • A splash of vanilla or caramel syrup for an at-home coffee shop vibe.

Pair one of these drinks with your favorite blanket and candle for the ultimate in comfort.


6. Cozy Comfort Food Favorites

Fall cooking is my love language — it’s when the kitchen really comes alive. This October, I’ve been making:

  • Creamy Butternut Squash Soup with crusty bread
  • Baked Brie with Fig Jam and Pecans for easy entertaining
  • Apple Crisp with a scoop of vanilla ice cream (a must!)
  • Pumpkin Bread for weekend mornings

Every bite feels like fall — warm, comforting, and best shared with friends and family.


October is the perfect month to slow down, cozy up, and celebrate the beauty of fall. Whether you’re updating your home decor, lighting your favorite candle, or trying a new comfort food recipe, these little seasonal touches make everyday moments feel special.

So grab a blanket, pour a mug of apple cider, and soak in every bit of this beautiful month.


**This post contains affiliate links, which means I might earn a small commission (at no extra cost to you) if you decide to make a purchase through one of these links. I only reccomend products I actually use or genuinely believe will bring value. Thanks for the support!

Fall, Favorite Finds

Sourdough Discard Cheeseburger Pizza

Apr 6, 2025 · Leave a Comment

Sourdough Discard Cheeseburger Pizza

Simply Styled and Well Seasoned
Print Recipe
Prep Time 15 minutes mins
Cook Time 7 minutes mins
Servings 2 pizzas

Ingredients
  

Sauce

  • ½ cup mayonnaise
  • ½ teaspoon smoked paprika
  • ½ teaspoon onion powder
  • ¼ teaspoon garlic powder
  • 10 cracks fresh black pepper
  • 1 Tablespoon dill pickle brine
  • 2 teaspoons ketchup
  • ½ teaspoon mustard
  • ¼ teaspoon Worcestershire sauce

Pizza

  • ½ pound ground beef
  • ½ cup yellow onion chopped
  • yellow cornmeal for dusting the pizza paddle
  • 2 sourdough discard pizza dough balls (see link to my sourdough discard pizza crust recipe below)
  • 3 cups mozzarella cheese whole milk mozzarella, freshly shredded
  • 1 ½ cups mild cheddar cheese freshly shredded
  • dill pickle slices ~1-1 ½ whole Claussen pickles, thinly sliced and patted dry

Instructions
 

  • Prepare sourdough discard pizza crust recipe 4-5 hours in advance.
  • Insert baking stone into the oven and begin to preheat to 500°F when you are 45 minutes from baking.
  • To a small mixing bowl add all of the sauce ingredients. Whisk together until smooth and set aside until ready to assemble the pizzas.
  • Cook the ground beef and chopped onion together in a skillet over medium-high heat until the beef is no longer pink (breaking the beef apart into small crumbles). Drain and then place on a paper towel lined plate to further soak up any excess grease.
  • When ready to bake, generously cover the surface of the pizza paddle with yellow cornmeal. Place one ball of dough on the paddle and use your hands to press the dough out into a pizza shape. Start in the center of the dough and work toward the edges (the shape does not need to be perfect).
  • Spread a portion of the sauce across the top. Add just enough to cover the surface, making sure that it is not too saucy (it will make the pizza soggy).
  • Layer with ½ of the mozzarella, then ½ of the cheddar cheese, and finally ½ of the ground beef & onion.
  • Drizzle some of the sauce across the pizza and place the sliced pickles on top.
  • Using the pizza paddle, slide the pizza onto the hot baking stone in the oven. Bake for 7-8, or until the bottom is cooked and the edges are golden.
  • Repeat steps 5-9 for the second pizza.
  • Serve immediately with extra sauce on the side for dipping.

Notes

If using a store bought pizza dough, follow the package instructions for oven temp and bake time.
  • Sourdough Discard Pizza Crust

Breads, Easy Dinners, Sourdough

Sourdough Discard Pizza Crust

Apr 6, 2025 · Leave a Comment

Sourdough Discard Pizza Crust

Simply Styled and Well Seasoned
Print Recipe
Prep Time 20 minutes mins
Cook Time 7 minutes mins
Rise Time: 4 hours hrs
Servings 2 pizza crusts

Equipment

  • Baking Stone
  • Pizza Paddle

Ingredients
  

  • 3 cups 'OO' flour 500 grams
  • 2 ½ teaspoons fine sea salt
  • ¼ teaspoon instant yeast
  • 1 ½ cups warm water 320 grams
  • ⅓ cup sourdough discard
  • olive oil
  • yellow cornmeal for dusting the pizza paddle

Instructions
 

  • To a large mixing bowl add the 'OO' flour, fine sea salt, and instant yeast. Combine using a fork.
  • Add the warm water and sourdough discard to the flour mixture. (I warm up tap water in the microwave for 40-45 secounds before adding). Using a wooden spoon or a danish dough whisk, mix until everything comes together into a shaggy dough. Cover the mixing bowl with a clean dish towel and allow the dough to sit for 2 hours.
  • After the 2 hour rest, turn the dough out onto a lightly floured surface and divide equally into 2 pieces using a bench scraper. Gently knead the first section 1 time, then form it into a ball. Repeat with the second piece.
  • Generously drizzle olive oil onto a baking sheet and spread evenly using your hand. Place a ball of dough onto each end of the baking sheet. Drizzle the dough with more olive oil and brush it evenly, covering all areas of the exposed dough. Cover with saran wrap and allow to rise for 2-3 hours.
  • Insert baking stone into the oven and begin to preheat to 500°F when you are 45 minutes from baking.
  • When ready to bake, generously cover the surface of the pizza paddle with yellow cornmeal. Place one ball of dough on the paddle and use your hands to press the dough out into a pizza shape. Start in the center of the dough and work toward the edges (the shape does not need to be perfect).
  • Add your favorite toppings (see our favorite recipes in the links).
  • Using the pizza paddle, slide the pizza onto the hot baking stone in the oven. Bake for 7-8, or until the bottom is cooked and the edges are golden.
  • Repeat steps 6-8 with the second ball of dough.

Notes

You can refrigerate the dough after step 3 and then allow it to rise & bake later.  Place the dough into a sealed container in the refigerator for up to 2 days.  Pull the dough out 2-2 1/2 hours prior to bake time and proceed with step 4.
  • Cheeseburger Pizza

Breads, Easy Dinners, Sourdough

Sourdough Discard Waffles

Apr 6, 2025 · 1 Comment

Sourdough Discard Waffles

Simply Styled and Well Seasoned
5 from 1 vote
Print Recipe
Prep Time 30 minutes mins
Servings 4 large waffles (Belgian waffle size)

Equipment

  • Belgian Waffle Maker

Ingredients
  

  • 2 cups all-purpose flour spooned and leveled
  • 1 teaspoon baking soda
  • 1 teaspoon baking powder
  • 1 teaspoon fine sea salt
  • 1 cup milk
  • 2 large eggs slightly beaten
  • 3/4 cup sourdough starter discard
  • 4 Tablespoons unsalted butter melted
  • 3 Tablespoons granulated sugar
  • 1 teaspoon vanilla extract

Instructions
 

  • In a small mixing bowl, whisk together the all-purpose flour, baking soda, baking powder, and fine sea salt.
  • In a separate mixing bowl combine the milk, eggs, sourdough discard, melted butter, sugar, and vanilla extract.
  • Add the dry ingredients to the wet ingredients and stir just until combined. Avoid overmixing the batter.
  • Allow the batter to rest at room temperature for 20-25 minutes. In the meantime, preheat the waffle maker. If you abe able to adjust the temperature setting, I set mine to a medium-high setting (setting 4 on my Cuisinart Flip Belgain Waffle Maker, with 5 being the highest/darkest temp setting).
  • When ready to cook, lightly spray the waffle iron with non-stick cooking spray, then add 3/4 cup of batter to the center of the iron. Gently spread the batter and cook according to your appliance instructions.
  • Serve immediately with your favorite toppings (we love sliced strawberries and Nutella!) Or, place a cooling rack on top of a baking sheet and add each waffle as you finish cooking them. Place into the oven on a 'keep warm' setting until ready to serve.

Breakfast, Sourdough

Puff Pastry Quiches

Mar 10, 2025 · Leave a Comment

Plated mini quiches with puff pastry crusts.

I have been thinking ahead to Easter brunch and planning all the details, because it will be here before I know it. These puff pastry mini quiches came to mind and turned out exactly as I had hoped! They are the perfect bite-sized treat to elevate Easter brunch or any gathering. With their flaky, buttery crust and rich, creamy filling, they are so versatile and absolutley delicious. Plus, they can easily be customized to suit any palate. Whether you’re a seasoned cook or a beginner in the kitchen, this puff pastry mini quiche recipe is straightforward, delicious, and sure to be a crowd-pleaser!

Plated mini quiches with a cup of hot coffee.

Why You’ll Love These Mini Quiches

  • Quick and Easy: This recipe uses store-bought frozen puff pastry for an effortless crust.
  • Customizable: You can add various fillings to suit your taste or accommodate dietary restrictions.
  • Perfect for Entertaining: These mini quiches are the perfect finger food for parties, brunches, or family get-togethers.
  • Flaky and Delicious: The puff pastry adds a buttery, flaky texture that perfectly complements the creamy quiche filling.

Ingredients for Puff Pastry Mini Quiches

For the Puff Pastry Quiches, you’ll need the following ingredients:

  • 2 sheets of frozen puff pastry (store-bought)
  • 5 large eggs
  • 1 cup heavy cream
  • 1 ½ cups finely shredded cheese (Gruyere or Havarti cheese)
  • 10 slices of bacon
  • 2/3 cup finely chopped shallots
  • Fine sea salt and ground black pepper
  • Pinch of ground nutmeg
  • Fresh herbs for garnish (optional, such as parsley, chives, or thyme)

Optional Fillings:

  • Cooked sausage
  • Chopped vegetables (spinach, mushrooms, bell peppers, onions)
  • Diced ham
  • Feta cheese or goat cheese
  • Fresh herbs like basil or rosemary
Bite out of a plated puff pastry quiche showing the quiche filling inside.

Step-by-Step Instructions for Making Puff Pastry Mini Quiches

Step 1: Prepare Your Muffin Tin

Preheat your oven to 400°F. Spray muffin tins with non-stick cooking spray or a light coating of olive oil.

Step 2: Cook the Bacon and Shallots

In a medium frying pan, cook the bacon pieces until crisp.  Remove the cooked bacon to a paper towel lined plate using a slotted spoon.  Reserve 1 Tablespoon of bacon fat in the pan. Add the shallots and cook over medium-low heat until softened, about 3-4 minutes.  Remove the pan from heat.

Step 3: Make the Egg Filling

In a medium bowl, whisk together the eggs, heavy cream, fine sea salt, ground pepper, and ground nutmeg.

Step 4: Prepare the Pastry Shells

Unfold the puff pastry onto a lightly floured surface or parchment paper.  Roll out to about 12 x 14 inches and cut each pastry into 12 even squares (do not worry about it being perfectly sized).  Press each piece into the prepared cups of the muffin tins.

Step 5: Fill the Pastry Shells

Spoon a small amount of softened shallots (about ½ teaspoon) into the bottom of each puff pastry lined cup.  Over the shallots, divide the cooked bacon equally into all 24 cups.  Add the finely shredded Havarti cheese equally and then fill each cup approximately ½ full with the egg mixture (about 1- 1 ½ Tablespoons in each cup). 

Step 6: Bake the Mini Quiches

Bake for 18-19 minutes or until the puff pastry is golden brown, the eggs are puffy, and a toothpick comes out clean when inserted into the center of the mini quiche.

Step 7: Cool and Serve

Cool for a few minutes before removing from the pans and serving warm, garnished with thyme or sliced green onions.

Muffin tin full of baked puff pastry  mini quiches.

Tips for Perfect Puff Pastry Mini Quiches

  1. Use Cold Puff Pastry: Ensure your puff pastry is thawed enough to work with, but still cold. Cold pastry keeps its structure and helps it puff up nicely when baked.
  2. Customize Your Fillings: You can experiment with different cheeses, meats, and veggies to suit your taste. For vegetarian options, consider adding sautéed spinach, sun-dried tomatoes, or roasted red peppers.
  3. Don’t Overfill: To avoid spillages, make sure not to overfill your mini quiches. Leave enough room for the egg mixture to puff up while baking.

Puff pastry mini quiche garnished with fresh thyme.

Flavor Variations for Puff Pastry Mini Quiches

One of the best parts of making mini quiches is that you can get creative with the fillings. Here are some delicious variations to try:

1. Classic Bacon and Cheddar

  • Fill your quiches with crispy bacon pieces and a generous helping of cheddar cheese. Add a pinch of chives for an extra layer of flavor.

2. Spinach and Feta

  • For a vegetarian option, use sautéed spinach and feta cheese. Add a touch of nutmeg to the filling for a little extra warmth.

3. Mushroom and Gruyère

  • Sauté some mushrooms with garlic and thyme and pair them with Gruyère cheese for a rich and earthy flavor combination.

4. Tomato and Basil

  • For a fresh twist, add chopped tomatoes and fresh basil along with a dollop of goat cheese or shredded mozzarella. This works wonderfully in the summer months when tomatoes are in season.

5. Ham and Swiss

  • A classic filling of diced ham and Swiss cheese makes for a savory and satisfying mini quiche. Add a little mustard for extra tang.
Plate full of mini quiches.

Puff pastry mini quiches are a delightful dish that can be enjoyed at any time of day. Whether you’re hosting a brunch, preparing snacks for a party, or simply looking for a quick and satisfying meal, these quiches are sure to impress. With endless variations and the option to customize the filling to your liking, you can experiment with flavors and create your own perfect mini quiches!

Plated mini quiches with puff pastry crusts.

Puff Pastry Mini Quiches

Simply Styled and Well Seasoned
Print Recipe Pin Recipe
Prep Time 20 minutes mins
Servings 24 muffin sized quiches

Ingredients
  

  • 10 slices of bacon cut into pieces
  • ⅔ cup shallots finely chopped
  • 5 large eggs
  • 1 cup heavy cream
  • ½ teaspoon fine sea salt
  • ¼ teaspoon ground black pepper
  • Pinch of ground nutmeg
  • 2 sheets frozen puff pastry thawed
  • 1 ½ cups Gruyere or Havarti cheese finely shredded
  • Fresh thyme or sliced green onion optional, for garnish

Instructions
 

  • Preheat oven to 400°F. Spray (2) 12-cup muffin tins with non-stick cooking spray.
  • In a medium frying pan, cook the bacon pieces until crisp.  Remove the cooked bacon to a paper towel lined plate using a slotted spoon.  Reserve 1 Tablespoon of bacon fat in the pan. Add the shallots and cook over medium-low heat until softened, about 3-4minutes.  Remove the pan from heat.
  • In a medium bowl, whisk together the eggs, heavy cream, fine sea salt, ground pepper, and ground nutmeg.
  • Unfold the puff pastry onto a lightly floured surface or parchment paper.  Roll out to about 12 x 14 inches and cut each pastry into 12 even squares (do not worry about it being perfectly sized).  Press each piece into the prepared cups of the muffin tins.
  • Spoon a small amount of softened shallots (about ½ teaspoon) into the bottom of each puff pastry lined cup.  Over the shallots, divide the cooked bacon equally into all 24 cups.  Add the finely shredded Havarti cheese equally and then fill each cup approximately ½ full with the egg mixture (about 1- 1 ½ Tablespoons in each cup). 
  • Bake for 18-19 minutes or until the puff pastry is golden brown, the eggs are puffy, and a toothpick comes out clean when inserted into the center of the mini quiche.
  • Cool for a few minutes before removing from the pans and serving warm, garnished with thyme or sliced green onions.

Don’t forget to share your creations on social media & tag us in your photos!

Happy baking!

Breakfast

Overnight Butterscotch Pecan Sticky Buns

Nov 18, 2024 · Leave a Comment

If you’re looking for a delicious and stress-free breakfast or brunch option, look no further than these Overnight Butterscotch Pecan Sticky Buns made with frozen rolls! These warm, gooey, melt-in-your-mouth buns are a perfect way to start your day, and best of all, you can prepare them the night before. With just a few simple ingredients, you’ll be able to whip up a batch that rivals anything from your favorite bakery. Plus, the convenience of using frozen dinner rolls makes this recipe not only easy but also incredibly foolproof.

Sticky buns after inverting onto a baking sheet.

Ingredients You’ll Need

To make these overnight butterscotch pecan sticky buns, you’ll need the following ingredients:

For the Sticky Buns:

  • 20 frozen dinner rolls (I use Rhodes rolls)
  • 1 (3.5 oz) package of cook & serve butterscotch pudding (NOT the instant pudding)
  • 1 cup pecans halves
  • 1 and 1/2 sticks of butter (unsalted)
  • 3/4 cup light brown sugar (packed)
Baked sticky buns in glass pan right after baking.

Step-by-Step Instructions

Step 1: Prepare the Pan and Rolls

Start by preparing your baking dish. You’ll need a 9×13-inch glass baking dish. Grease the dish with non-stick cooking spray to prevent sticking.

Next, arrange the frozen rolls in the pan. As they rise overnight, they’ll expand and fill in the gaps. Sprinkle the DRY pudding mix evenly over the rolls, followed by the pecan halves.

Step 2: Make the Syrup

In a small saucepan over medium-low heat, melt the butter. Once melted, remove the pan from heat and whisk in the brown sugar until it is fully dissolved and the sauce is smooth. This caramel sauce will create the delicious sticky glaze that coats the buns.

Pour the mixture evenly over the rolls and nuts, making sure they’re well-coated. Place the uncovered dish into a cold oven overnight. This gives the rolls time to thaw and rise, soaking up the syrup for a perfectly gooey texture the next morning.

Step 3: Bake the Sticky Buns

The next morning, remove the pan from the oven before you preheat your oven to 350°F. Once the oven is ready, put the rolls in and bake for 25 minutes, or until the tops are golden brown and the sauce is bubbling. You’ll know they’re done when the rolls are puffy and the edges are caramelized.

Step 5: Serve and Enjoy!

Remove the buns from the oven and immediately invert them onto a serving platter or baking sheet. The gooey butterscotch sauce will drip across the rolls, creating a deliciously messy and indulgent treat!

Warm and gooey sticky buns, topped with pecans being serving.

Recipe Tips for Perfect Sticky Buns

  • Use quality frozen rolls: The quality of your frozen rolls will impact the texture of your sticky buns. Try to use a brand that you know and trust for the best results. I love how the Rhodes brand rolls turn out in this recipe.
  • Let the rolls thaw overnight: For the best texture and rise, let the rolls thaw and rise uncovered in a cold oven overnight. I choose not to cover them because as the rolls rise they tend to stick to saran wrap or other covering.
  • Add more nuts: If you love extra crunch, feel free to add more pecans.
Warm and gooey sticky buns served on a plate.

Variations to Try

  • Pumpkin Spice Sticky Buns: Add 1/2-1 teaspoon of pumpkin pie spice to the dry butterscotch pudding mix for a fall-inspired twist.
  • Apple Cinnamon Sticky Buns: Add finely chopped apples when you add the pecans for a caramel apple version. A sprinkle of cinnamon sugar over the apples before baking adds extra spice.
  • Top with a cream cheese frosting: If you want to take these sticky buns over the top (Christmas!), add a simple cream cheese frosting. Mix cream cheese, powdered sugar, vanilla, and a bit of milk until smooth, and spread it over the warm buns. I have also swapped eggnog for the milk on occasion.
Closeup view of warm and gooey sticky buns topped with pecans.

These Overnight Butterscotch Pecan Sticky Buns are the ultimate make-ahead treat for holidays, brunches, or any special occasion. They combine the convenience of frozen rolls with a rich, indulgent butterscotch pecan topping that will have everyone coming back for more. Whether you stick to the classic version or experiment with variations, this recipe is sure to become a family favorite!

Overnight Butterscotch Pecan Sticky Buns

Simply Styled and Well Seasoned
Print Recipe Pin Recipe
Prep Time 10 minutes mins
Servings 10

Ingredients
  

  • 20 frozen white dinner rolls I use Rhodes rolls
  • 1 (3.5 oz) package of cook & serve butterscotch pudding
  • 1 cup pecan halves
  • 1 ½ sticks unsalted butter
  • ¾ cup light brown sugar packed

Optional: Vanilla Sea Salt

  • 2 tablespoons flake sea salt I use Maldon Sea Salt Flakes
  • 2 teaspoons vanilla bean paste

Instructions
 

  • Spray a 9X13-inch glass baking dish with non-stick cooking spray.
  • Place 20 frozen rolls into the prepared baking dish.
  • Sprinkle the DRY pudding mix across the top of the rolls. Add the pecans across the top.
  • Melt the butter in a small saucepan on your stovetop over medium-low heat. Remove from heat and whisk in the brown sugar. Pour the mixture over the top of the frozen rolls.
  • Place your uncovered pan into a cold/unheated oven overnight.
  • The following morning, remove the pan from the oven before preheating to 350°F. Once oven is heated, bake for 25-30 minutes or until the tops are golden brown and the rolls are baked through (I always check the center rolls since they take the longest to bake through). If the rolls around the edge are browning too quickly you can tent with aluminum foil.
  • While the rolls are baking, mix together the flake sea salt and vanilla bean paste, if using.
  • Remove the baked rolls from the oven and immediatley invert them onto a serving platter or baking sheet. Sprinkle with the vanilla sea salt and enjoy!

Ready to enjoy a warm, sticky treat tomorrow morning? Prepare these tonight and wake up to the heavenly smell of freshly baked sticky buns – all without the stress of last-minute prep!

Breads, Breakfast, Christmas

Maple Brown Butter Granola

Nov 7, 2024 · Leave a Comment

If you’re looking for a homemade granola recipe that combines the rich, nutty flavor of browned butter with the sweet, caramelized notes of maple syrup, look no further! Maple Brown Butter Granola is a game-changer when it comes to breakfast or snacking, delivering a perfect balance of crunch, sweetness, and depth of flavor. Plus, it’s incredibly easy to make at home! Whether you’re enjoying it with yogurt, sprinkling it over smoothie bowls, or simply eating it by the handful, this homemade granola will quickly become a pantry staple.

Granola with a sweet, caramelized maple brown butter coating.

In this post, I’ll walk you through a step-by-step guide on how to make Maple Brown Butter Granola, share some tips for perfect granola every time, and suggest variations to suit your taste preferences.

Ingredients for Maple Brown Butter Granola

Here’s what you’ll need to make this maple brown butter granola:

  • Rolled oats – Old-fashioned rolled oats work best for granola as they hold their shape during baking.
  • Nuts (optional) – We love pecans in this granola, but you could also use walnuts, almonds, or hazelnuts for an added crunch. You can skip this if you prefer a nut-free version.
  • Unsalted butter – The key ingredient for browning, which imparts a rich, nutty flavor to the granola.
  • Maple syrup – Choose real maple syrup for the best flavor, and avoid imitation maple syrup or pancake syrup.
  • Brown sugar – Light brown sugar enhances the caramelization of the oats, adding sweetness and depth.
  • Cinnamon – For a warm, comforting spice flavor.
  • Salt – A pinch of salt enhances the sweetness and balances the richness of the brown butter.
  • Vanilla extract – For a hint of vanilla warmth.
Granola with a sweet, caramelized maple brown butter coating.

Equipment:

  • Baking sheet – Line it with parchment paper or a silicone baking mat to prevent sticking.
  • Large mixing bowl – To combine all the ingredients.
  • Small saucepan – To brown the butter.
  • Rubber spatula – For mixing and stirring.

Step-by-Step Instructions to Make Maple Brown Butter Granola

Step 1: Preheat Your Oven

Preheat your oven to 300°F and line a large baking sheet with parchment paper or a silicone mat. This ensures your granola won’t stick and allows it to bake evenly.

Step 2: Mix the Dry Ingredients

In a large mixing bowl, combine oats, pecans, brown sugar, cinnamon, and fine sea salt. You can use your favorite combination of nuts instead of pecans here depending on your preferences. Stir to combine and ensure that everything is evenly distributed.

Step 3: Brown the Butter

In a small saucepan over medium heat, melt the unsalted butter. Continue to cook the butter, swirling the pan occasionally, until the butter begins to foam and then turns golden brown with a nutty aroma. This should take about 5 minutes. Be careful to not let it burn.

Once the butter is browned, remove the saucepan from the heat and stir in the maple syrup and vanilla until well combined. You’ll be left with a luscious, sweet, and nutty butter-syrup mixture that will coat your granola beautifully.

Step 4: Add the Wet Ingredients

Pour the browned butter mixture over the oats and pecan mixture, and stir to coat all the dry ingredients. You want every oat and nut to be well-covered with the maple syrup-butter mixture. This will help the granola crisp up in the oven.

Step 5: Bake the Granola

Spread the granola mixture in an even layer on your prepared baking sheet. Bake in the preheated oven for 35 minutes, stirring every 10minutes to ensure even baking. The granola should turn a golden brown and become crisp around the edges. Keep a close eye on it toward the end to avoid burning.

Step 6: Let the Granola Cool

Once baked, remove the granola from the oven and allow it to cool completely on the baking sheet. This step is crucial for achieving the perfect crunchy texture. As the granola cools, it will crisp up and form delicious clusters.

Step 7: Break Apart Granola Clusters

Once the granola is fully cooled, gently break into clusters.

Granola with a sweet, caramelized maple brown butter coating in a jar.

Maple Brown Butter Granola Tips for Success

  • Don’t overbake: Keep an eye on your granola in the oven. It may look slightly soft when you first pull it out, but it will continue to crisp up as it cools. Overbaking can lead to burnt bits, which will affect the flavor.
  • Use real maple syrup: For the best flavor, always use pure maple syrup instead of artificial or pancake syrup. The real deal has a depth and richness that makes all the difference in this granola.
  • Customize your nuts and seeds: You can substitute any nuts or seeds you like. Pecans and almonds are particularly delicious, but pumpkin seeds or sunflower seeds work well too.
  • Store properly: Store your cooled granola in an airtight container at room temperature for up to 2 weeks.

Delicious Variations of Maple Brown Butter Granola

While this basic Maple Brown Butter Granola recipe is fantastic on its own, here are some fun variations to customize the flavor and texture:

1. Coconut Maple Brown Butter Granola

Add 1/2 cup shredded coconut (unsweetened) to your dry ingredients for a tropical twist. The coconut adds a subtle sweetness and extra crunch.

2. Spiced Maple Granola

For a deeper flavor profile, add 1/4 teaspoon ground ginger or 1/4 teaspoon nutmeg to the cinnamon in your dry ingredients. This will give the granola a lovely spiced aroma and taste.

3. Maple Cinnamon Apple Granola

Add 1/2 cup freeze-dried apple pieces to the granola after it’s cooled. The tart apple pairs perfectly with the sweet maple and cinnamon flavors, offering a unique twist on the classic recipe.

Maple Brown Butter Granola

Simply Styled and Well Seasoned
Print Recipe Pin Recipe

Ingredients
  

  • 3 ½ cups old fashioned oats
  • ¾ cup chopped pecans
  • ¼ cup light brown sugar packed
  • 1 teaspoon cinnamon
  • ½ teaspoon fine sea salt
  • ¼ cup unsalted butter
  • ¾ cup maple syrup
  • 1 ½ teaspoons vanilla extract

Instructions
 

  • Preheat oven to 300°F. Line a baking sheet with parchment paper and set aside.
  • Mix together the oats, pecans, brown sugar, cinnamon and fine sea salt in a large mixing bowl. Set aside.
  • In a small saucepan, melt the butter over medium heat. Continue cooking 3-5 minutes while swirling occasionally. You'll know it's done when the butter is amber in color and has a nutty aroma. Remove from heat and stir in the maple syrup and vanilla.
  • Pour the brown butter maple mixture over the dry oat mixture and stir until fully coated.
  • Spread the combined mixture onto the prepared baking sheet and bake for 35 minutes, stirring every 10 minutes so that it toasts evenly.
  • Allow the granola to fully cool before breaking into clusters. Store in an airtight container.

Maple Brown Butter Granola is an irresistible breakfast or snack that is both satisfying and full of flavor. By following these simple steps and using high-quality ingredients, you’ll be able to create a batch of granola that is crunchy, sweet, and totally addictive. Whether you enjoy it in your morning yogurt, sprinkled over a smoothie bowl, or eaten by the handful, this granola will soon become your go-to recipe.

Happy granola-making!

Breakfast, Snacks

Easy Key Lime Pie

May 7, 2024 · Leave a Comment

Full top view of key lime pie in a graham cracker crust.

Growing up we often vacationed in South Carolina with my aunt & uncle’s family. This recipe was one I always looked forward to my aunt making while we were there! This dessert is smooth and creamy with the perfect blend of tart and sweet.

Full top view of key lime pie in a graham cracker crust.

Slice of key lime pie being pulled from the pie.

Easy Key Lime Pie Recipe

Simply Styled and Well Seasoned
Print Recipe

Ingredients
  

  • 10 sheets graham crackers crushed
  • 3 tablespoons granulated sugar
  • 7 tablespoons unsalted butter melted
  • 2 (14 oz) cans sweetened condensed milk I use Eagle Brand
  • ¾ cup key lime I use Mrs. Biddle's Key West Key Lime Juice
  • ½ cup sour cream
  • zest of 3 key limes

Optional: sliced key limes, whipped topping, and/or additional key lime zest for topping & garnish

Instructions
 

  • Preheat oven to 375°F.
  • Mix together the crushed graham crackers, sugar, and butter. Press into a 9" pan. Bake for 10 minutes. Allow to cool.
  • Blend together the sweetened condensed milk, key lime juice, sour cream, and key lime zest with a hand held mixer. Stir with a spoon after blending to release some of the air bubbles (it makes for a smooth top on the pie). Pour the mixture into the graham cracker crust.
  • Chill for at least 3 hours before serving.

Desserts

Everything Bagel Seasoning Sourdough Bread

Apr 17, 2024 · Leave a Comment

Jump to Recipe

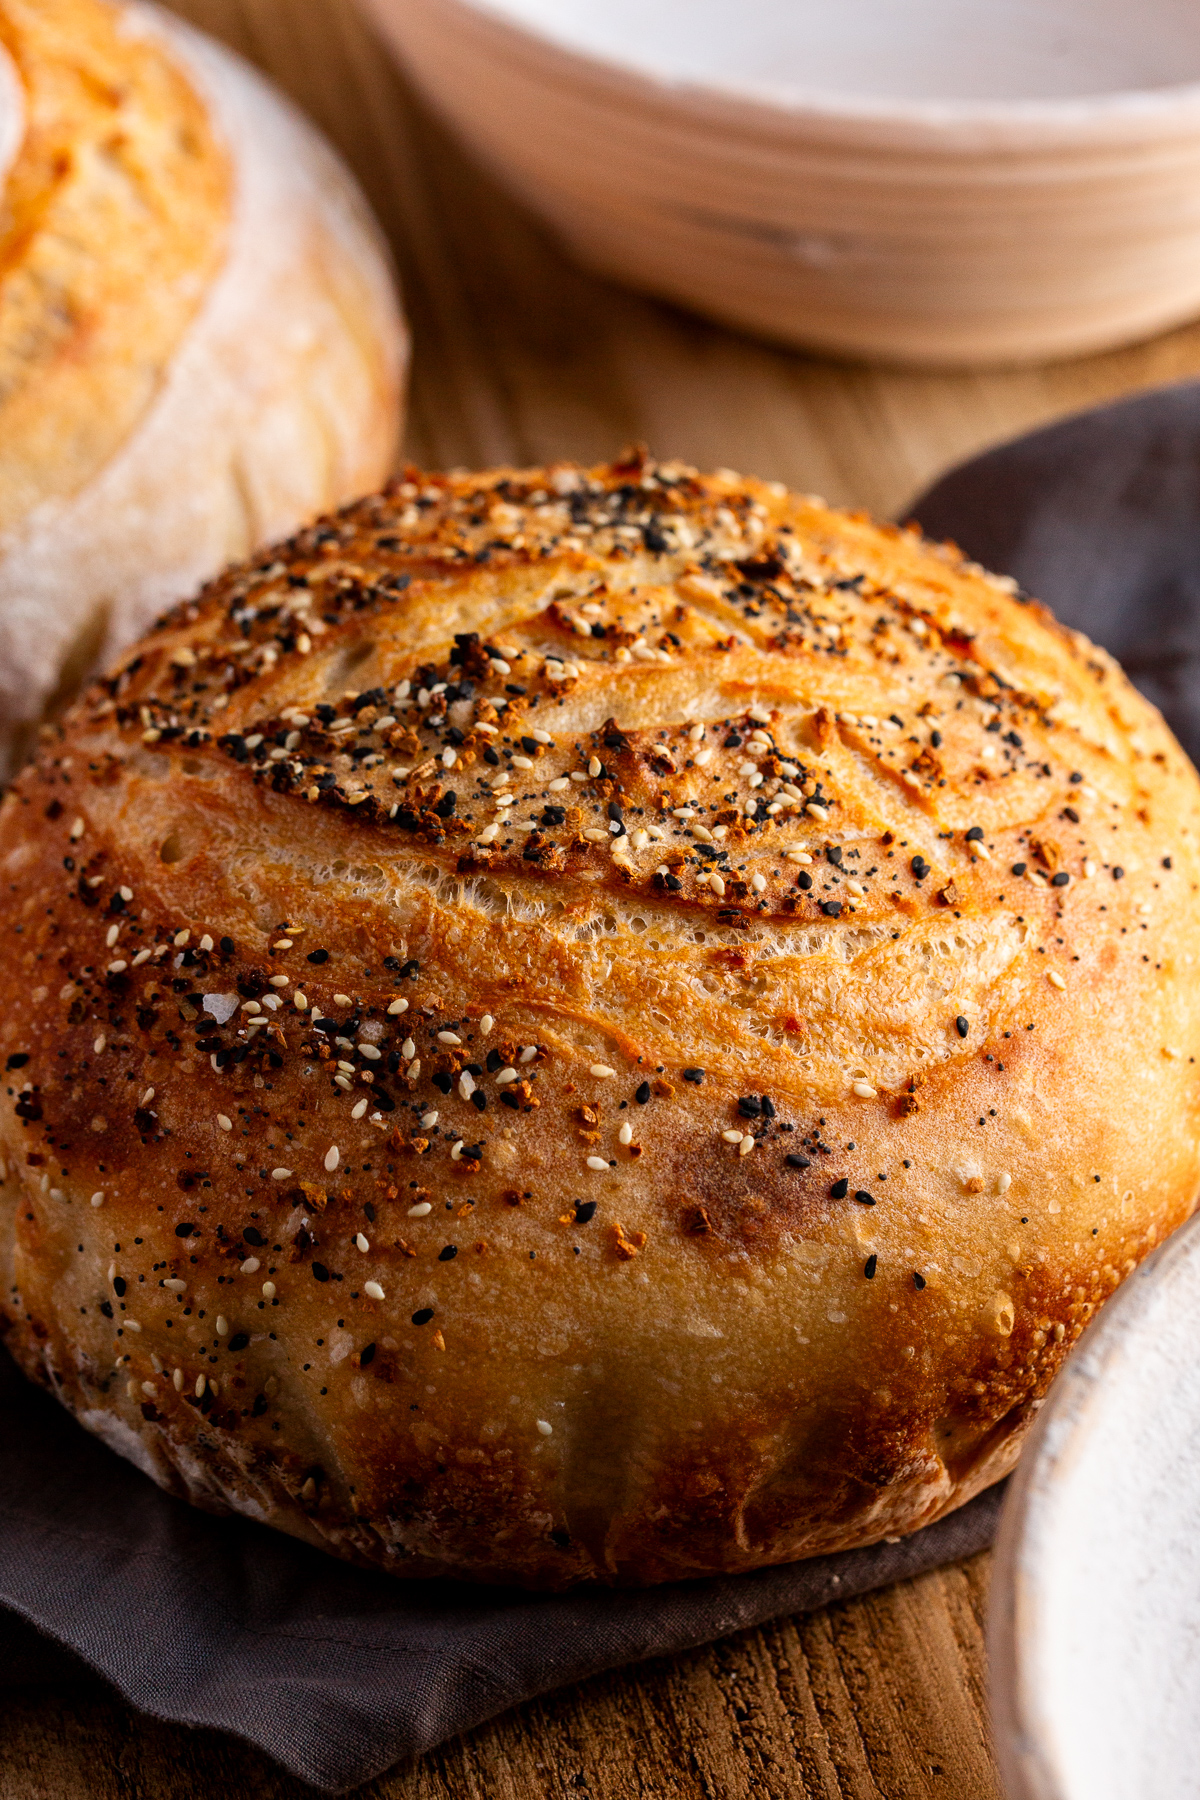
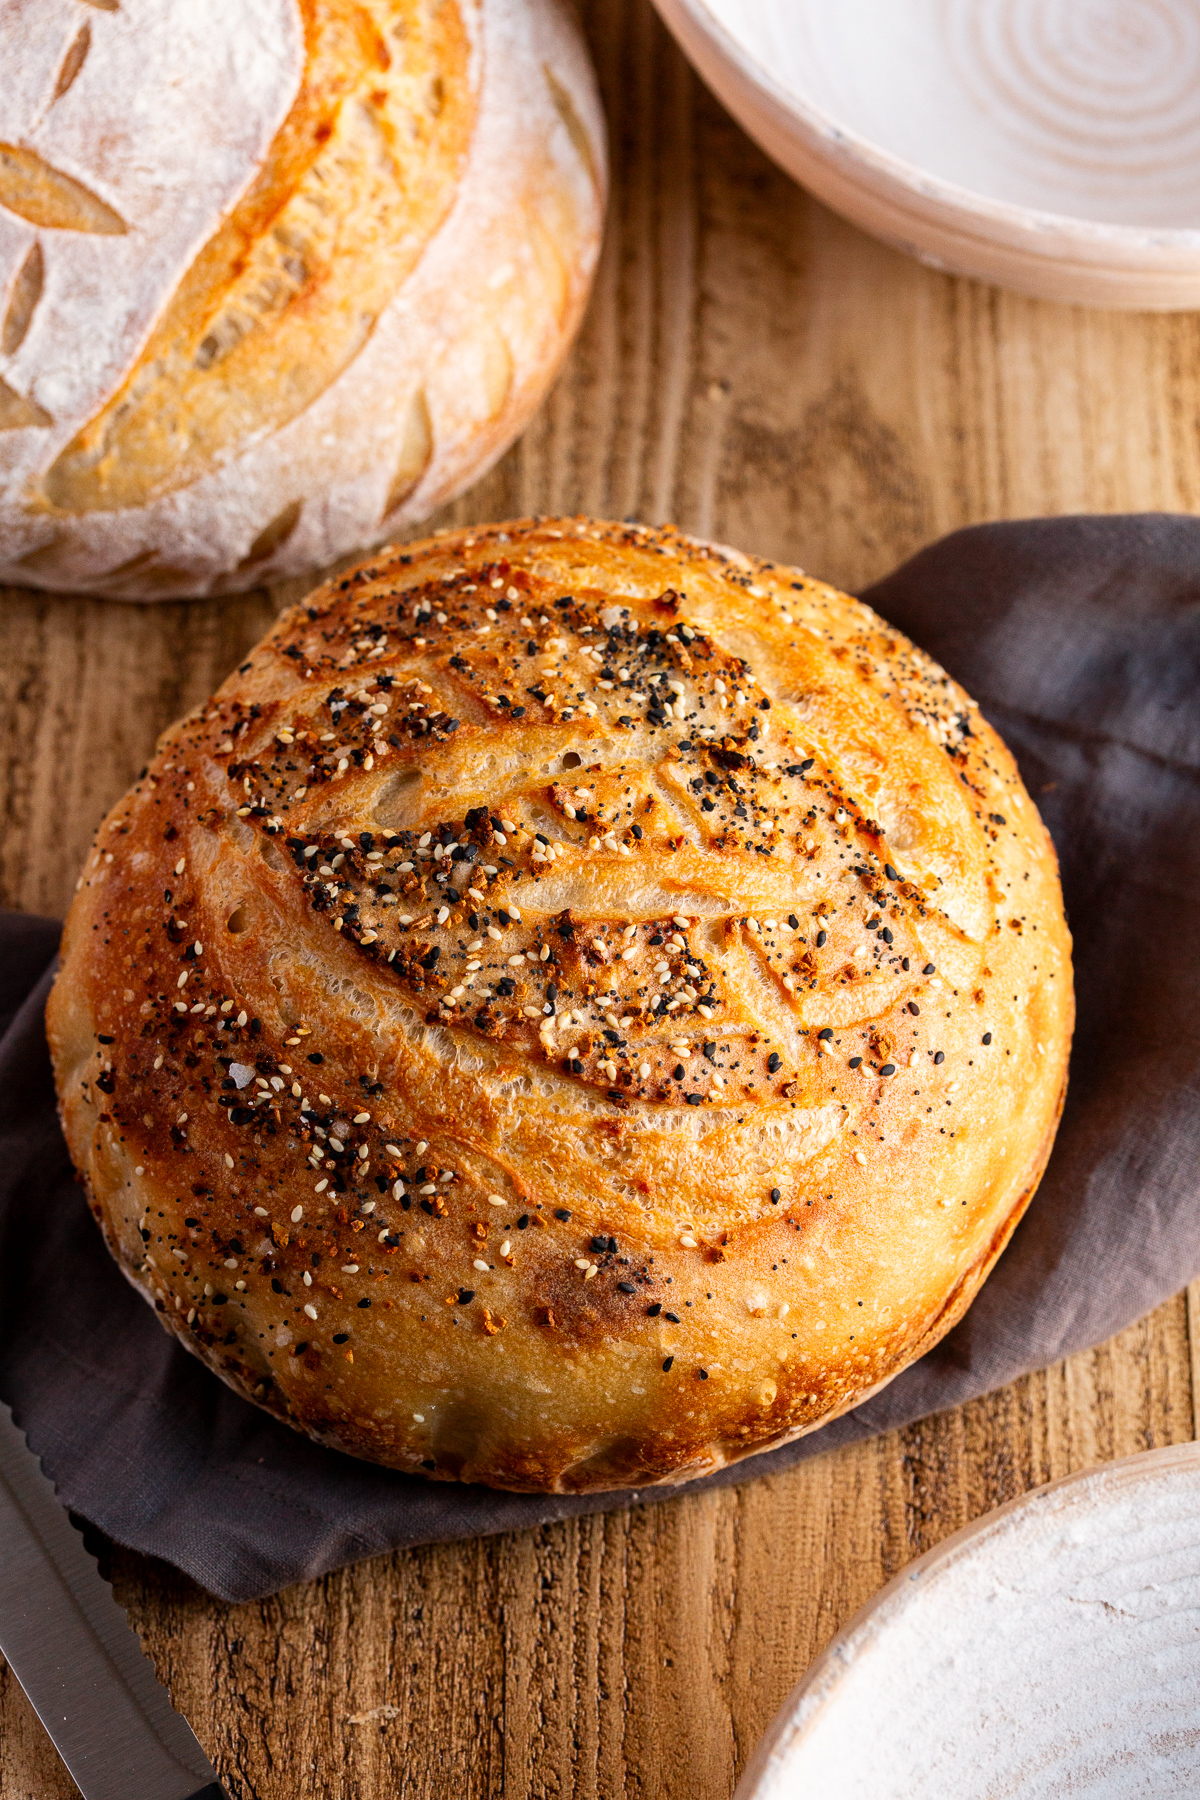
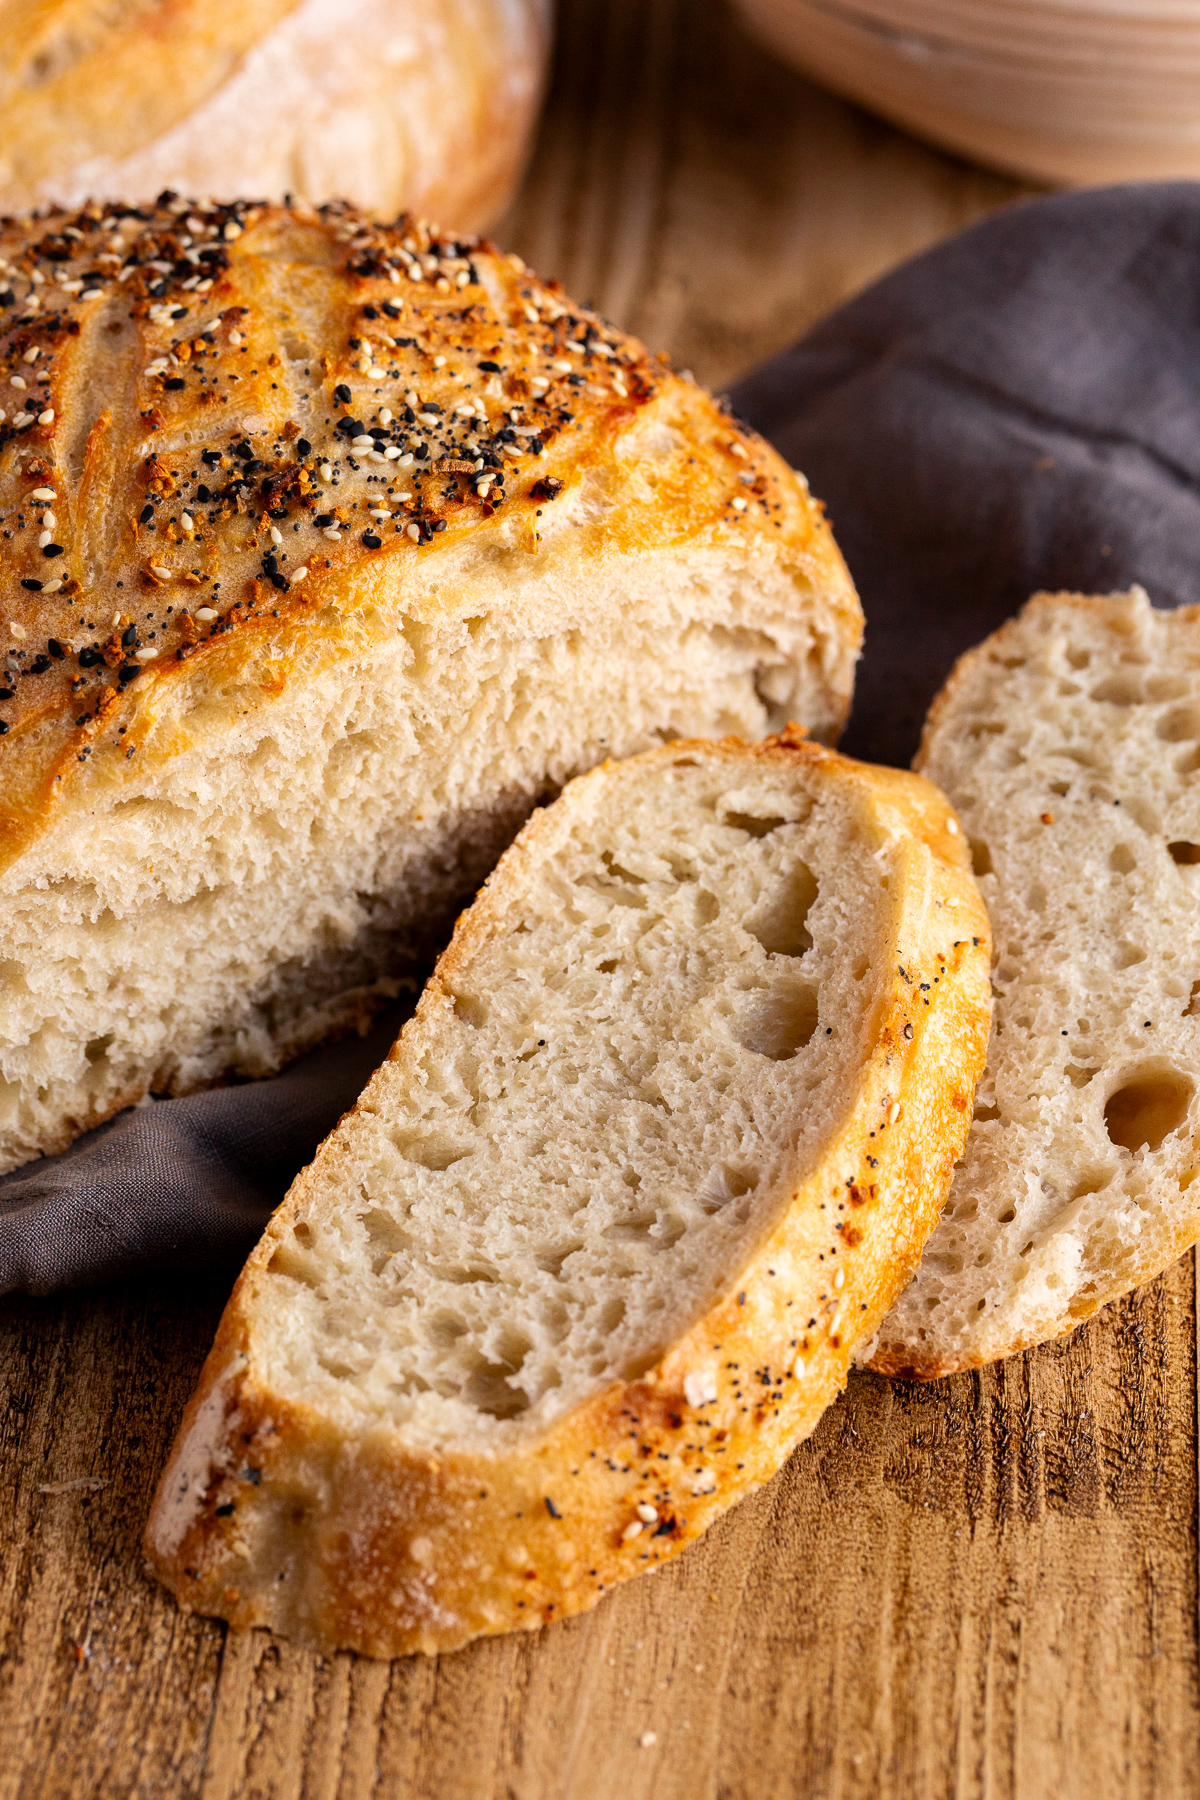
This recipe starts with my basic sourdough bread recipe and is elevated with the use of everyday bagel seasoning. Perfect for any savory breakfast recipe, this bread makes the most delicious avocado toast, breakfast sandwich, or toasty base for a sunny side up egg. I also love this version for grilled cheese!

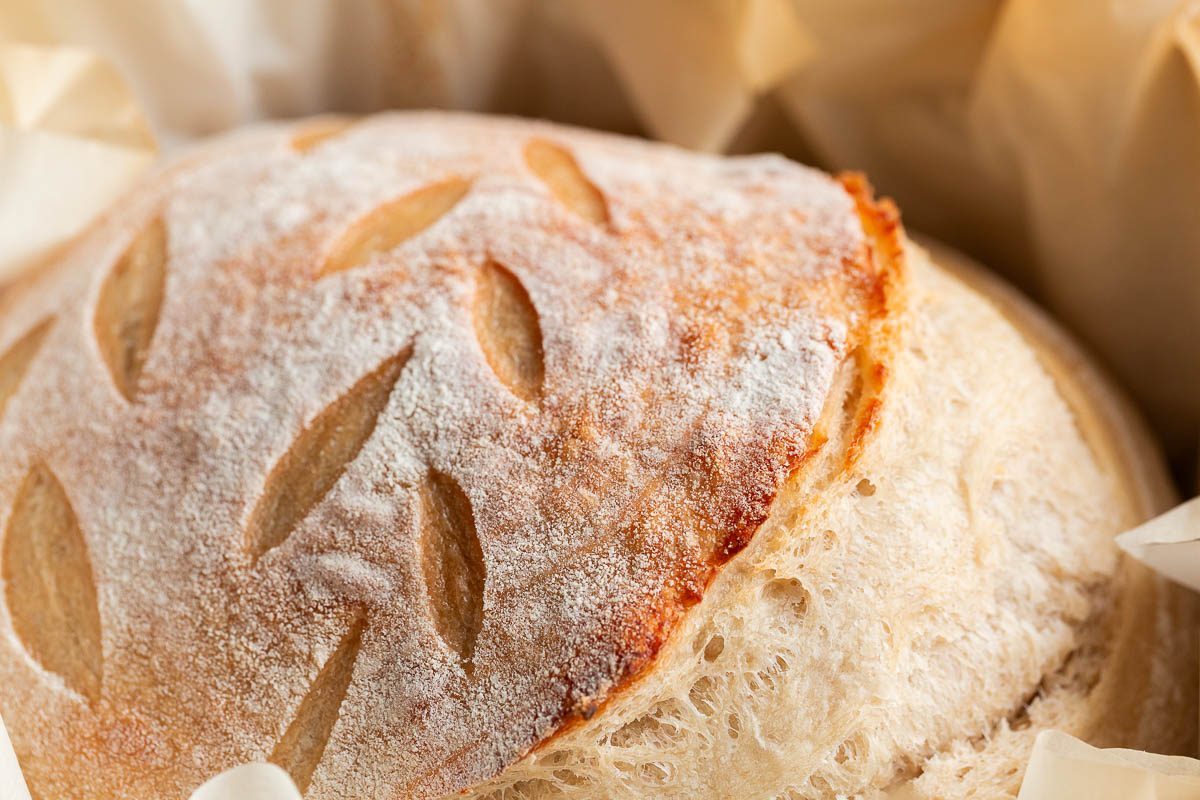
Round sourdough bread loaf with everything bagel seasoning.

For all my tips and tricks on feeding your sourdough starter and feeding schedules to keep your starter happy, check out my full post under basic sourdough bread recipe.

Sliced sourdough bread with everything bagel seasoning.

Everything Bagel Seasoning Sourdough Bread

Simply Styled and Well Seasoned
Print Recipe Pin Recipe
Prep Time 1 hour hr
Cook Time 40 minutes mins
Resting Time 23 hours hrs
Servings 2 loaves

Ingredients
  

  • 1000 grams bread flour (I use King Arthur bread flour)
  • 700-710 grams water
  • 1 tablespoon sea salt
  • 270 grams active sourdough starter
  • rice flour for dusting the bread proofing baskets/bannetons (I use Bob's Red Mill rice flour)
  • 2-3 tablespoons everything bagel seasoning

Instructions
 

  • Combine the bread flour, water, and salt in a large mixing bowl. Mix with a danish dough hook or fork until it becomes a shaggy dough. Cover for 1 hour for autolyse (autolyse is when the mixture of flour and water is given a period of time to rest before bulk fermentation).
  • Add the sourdough starter and mix thoroughly by hand. It will take several minutes to fully incorporate the starter. The dough is ready when it is smooth but still sticky to the touch.
  • Once mixed, place into a large clean mixing bowl and cover until almost doubled in size. This will take several hours (I usually give mine around 3-4 hours or more depending on the temperature in my home during a given season, but your time may vary). You can speed up the process a bit by placing the bowl on top of a heating pad set to the lowest setting for this bulk fermentation period.
  • Once it has doubled in size, you can begin the stretch and fold process. Grab one side of the dough and fold it back onto itself. Rotate the bowl by a quarter turn and repeat. Repeat twice more, for a total of 4 stretch and folds. Cover and let rest for 30 minutes. Note: it can help to wet your hands with water before doing each stretch and fold so that the dough doesn't stick to your hands as much.
  • Repeat the previous step every 30 minutes. Do this 3 to 4 times (for a total of 4-5 total stretch and folds). The dough gets stonger with each stretch and fold.
  • Prepare 2 bannetons by first lightly saturating the inside of the basket with water (note: I do not use the linen liner cloth). Then generously dust the basket with rice flour until all areas are well covered with the flour.
  • After the final stretch and fold, divide the dough into 2 equal portions on a lightly floured surface. Shape the dough and place into the prepared bannetons using your dough scraper as needed. Cover and place into the refrigerator overnight.
  • In the morning, remove the dough from the refrigerator and set on the counter while preheating the oven. Place a dutch oven (lid and all) into the oven and then begin preheating to 450°F. Once the oven has reached 450°F, continue preheat for an additional 30 minutes to allow the dutch oven to fully heat prior to baking.
  • Turn out the first banneton of dough onto a large square of parchment paper. Mist water across the loaf and then sprinkle on the everything bagel seasoning. Score the sourdough with a bread lame. Remove the dutch oven from the oven and lift the dough into the dutch oven using the parchment paper. Cover with lid and return to the oven.
  • Bake for a total of 40 minutes. Keep the dutch oven covered for the first 15-20 minutes, then remove lid for for the remaining time (leave the lid somewhere within the oven to continure heating for the second loaf).
  • Remove the sourdough from the oven and let cool fully on a cooling rack.
  • Repeat steps 9-11 for the second loaf.

I think you will end up loving this sourdough bread just as much as I do! Let me know if you try it and how it turns out for you!

Breads, Sourdough

How to Revive Hydrangeas

Feb 23, 2024 · Leave a Comment

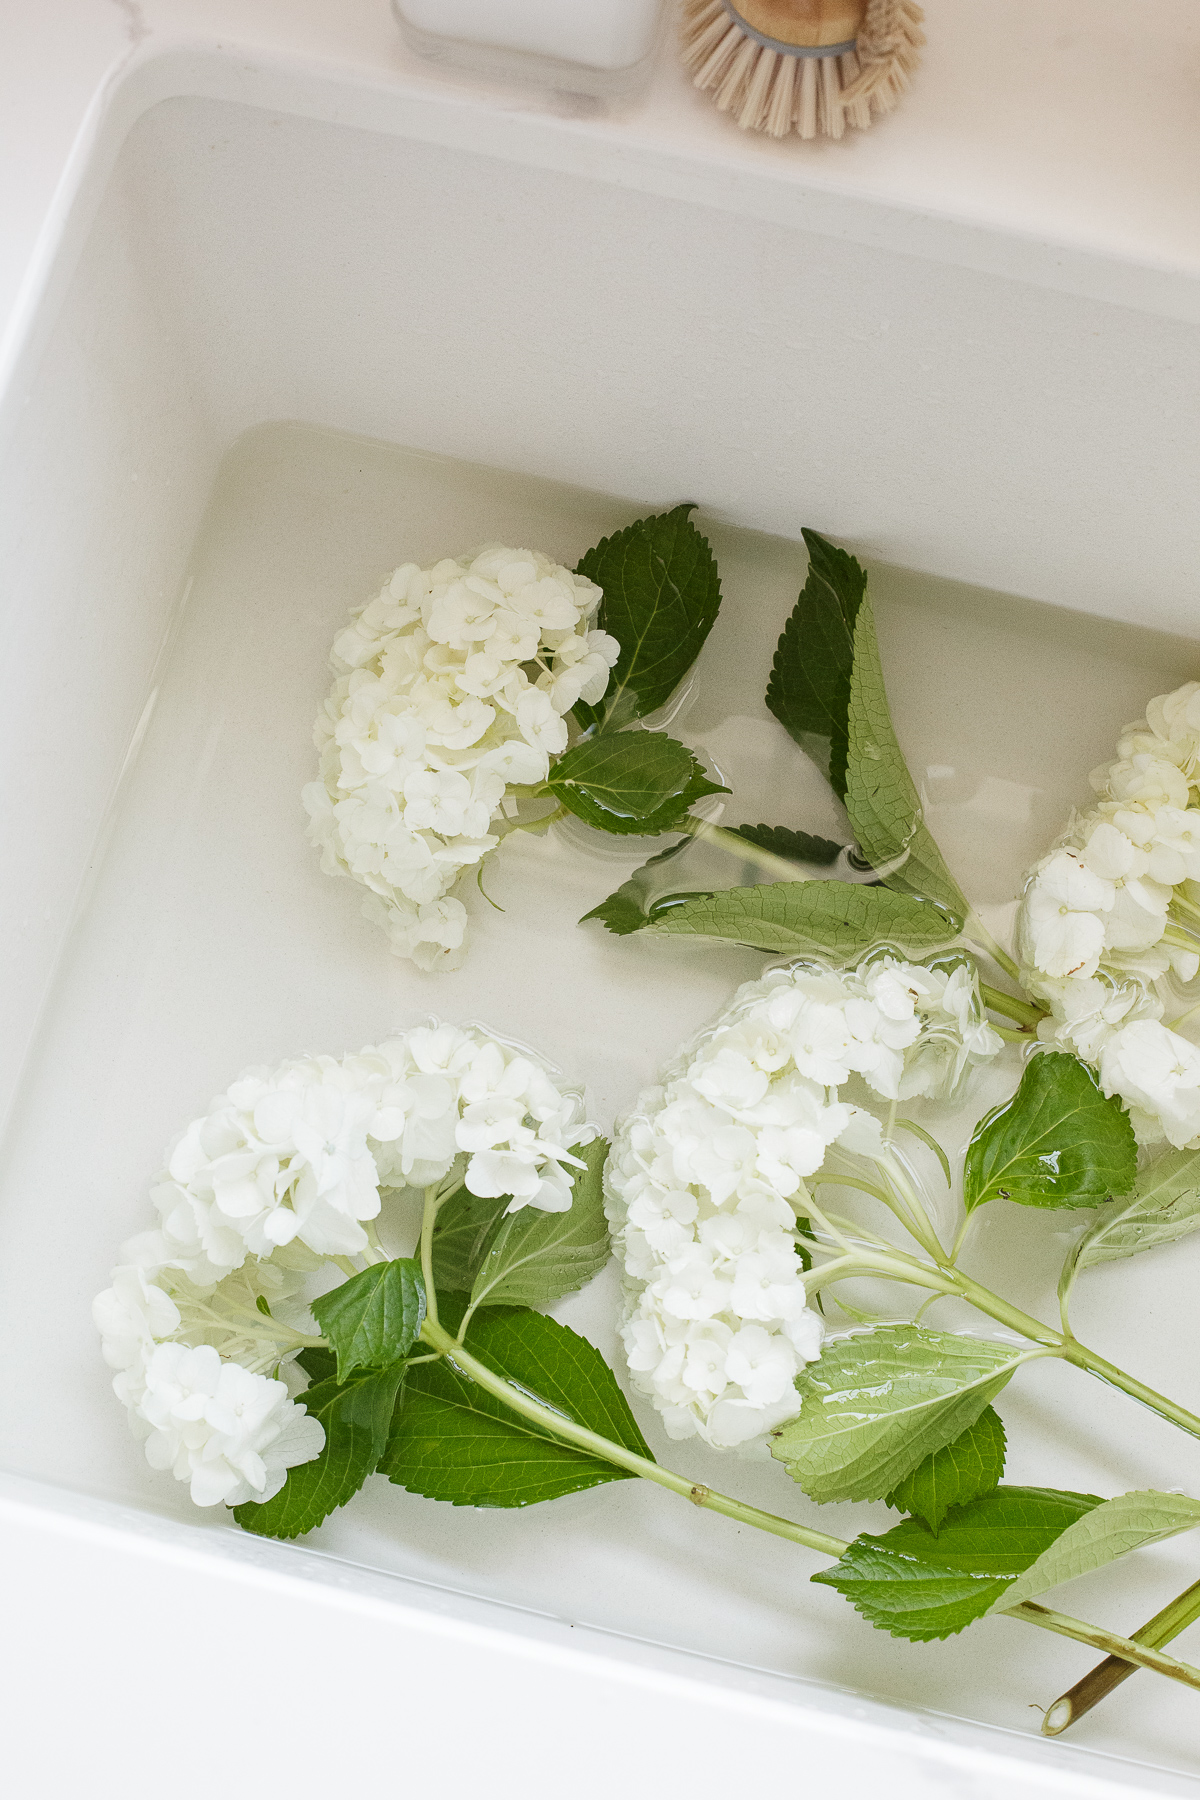
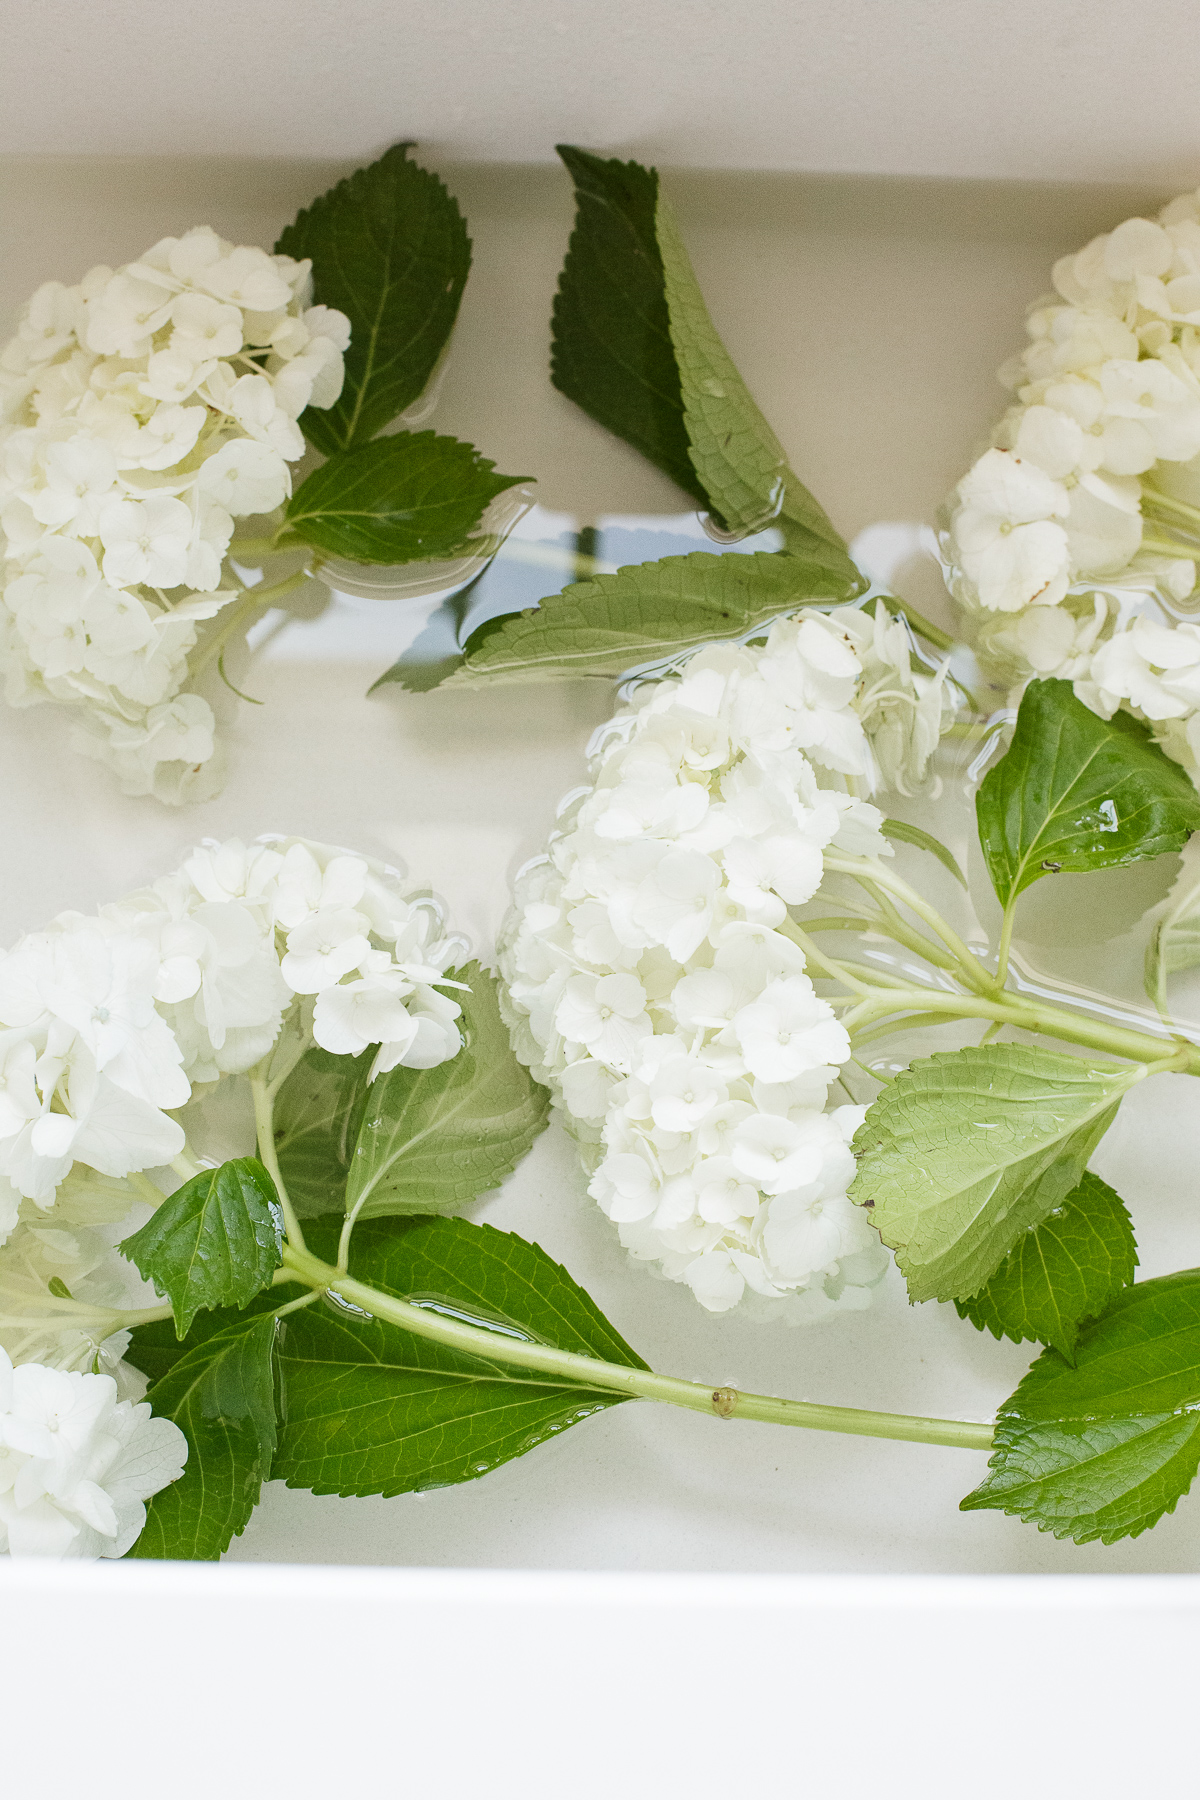
White hydrangeas soaking in water in a sink.

Maybe you just snagged a pretty bunch of hydrangeas from your local grocery store with the hopes of enjoying the fresh beauty they add to your home for several days to come. You rushed home, placed them into a vase of water, and even added the little packet of plant food that came with the flower bundle. A day later (or possibly a mere few hours later) you find them drooping and wonder exactly what went wrong.

If you found this post looking for answers, you have come to the right place! I preface all of my tips by saying that while there’s no absolute guarantee your wilted hydrangeas will perk back up, there’s a really great chance that you can revive your hydrangea blooms with these popular tips and tricks!

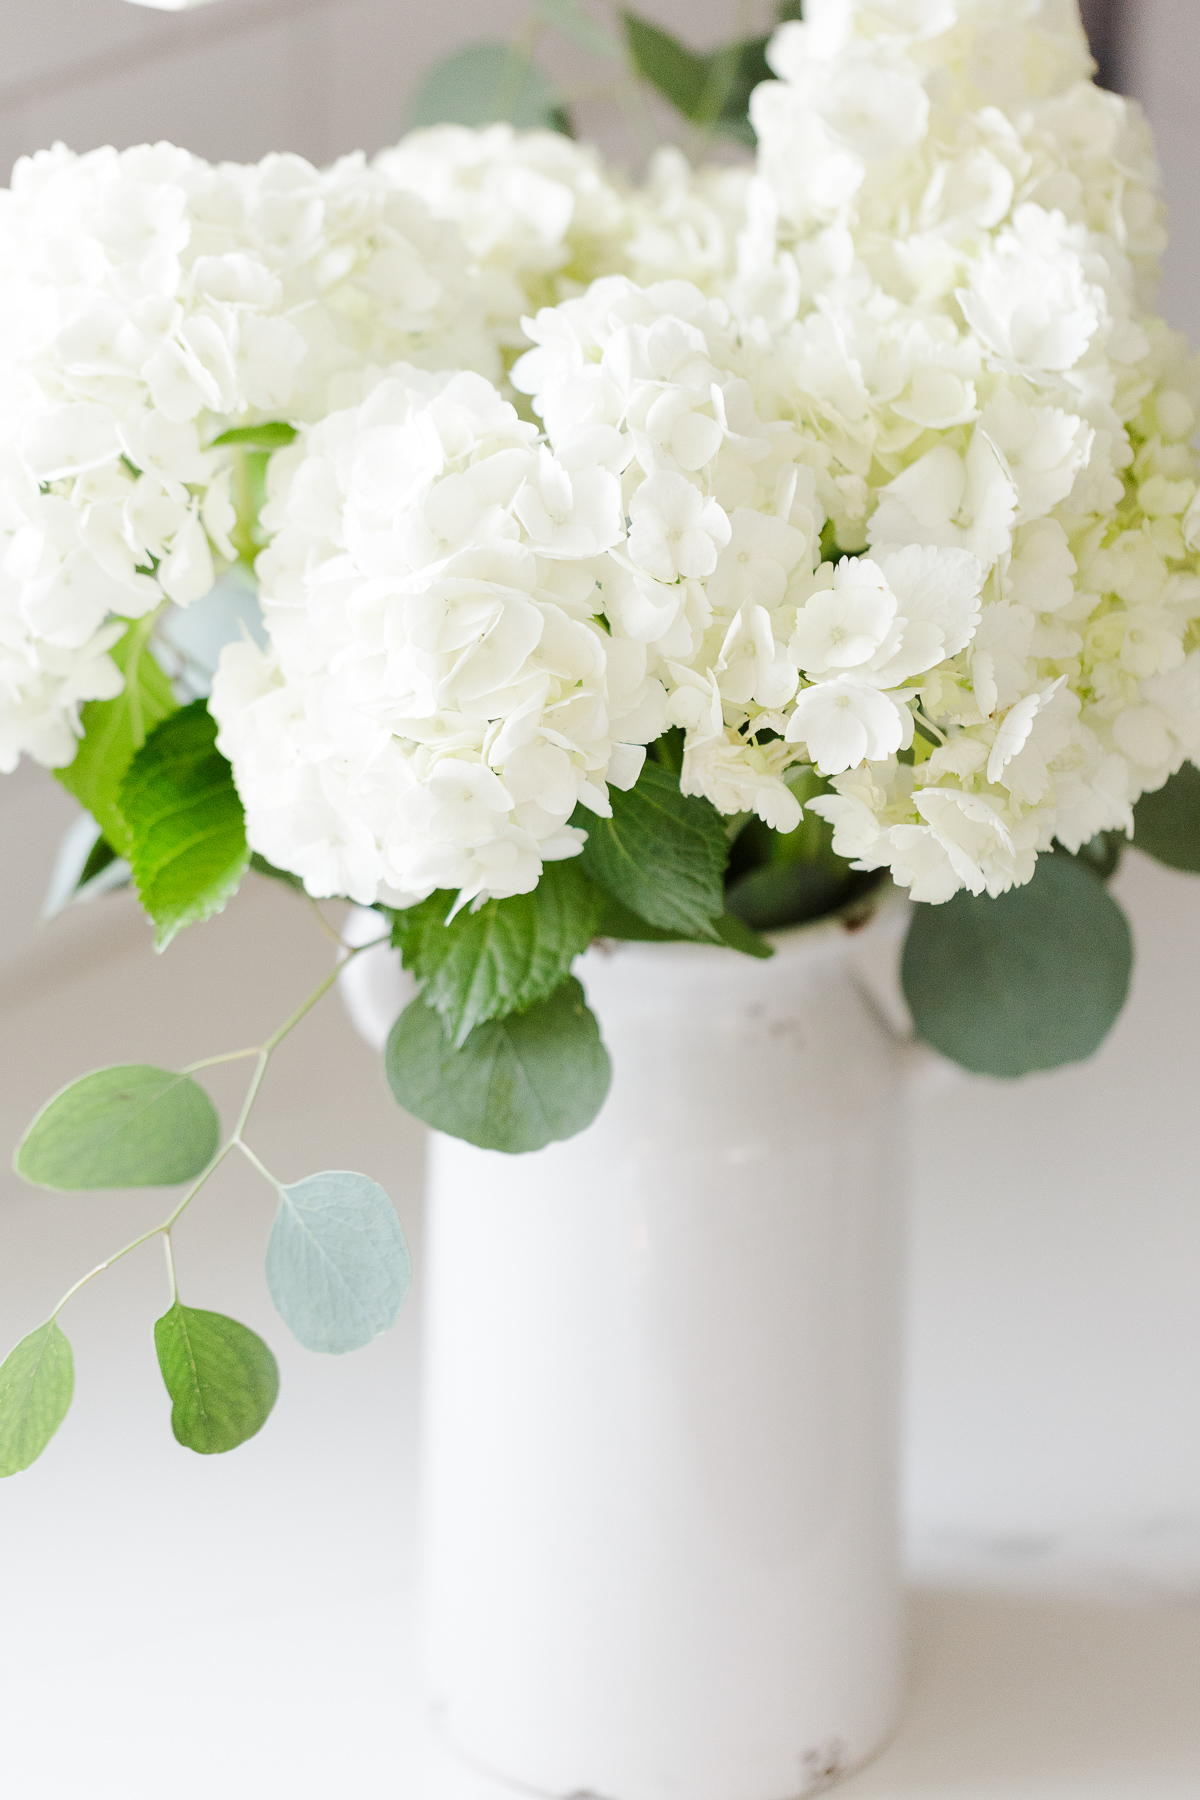
Vase of freshly revived white hygrandgeas.

Why Do Cut Hydrangeas Wilt So Quickly?

The name hydrangea, when broken down, translates to ‘water vessel’ or ‘water jar’. Appropriately named for it’s behavior, it is a flower that needs LOTS of water. So much so, that even momentarily being without water can cause them to start wilting. I would even recommend having a water bottle or baggy of water to transport your blooms home from the store! If you are cutting fresh stems from your yard or garden I have included some tips to prevent your hydrangeas from drooping in the first place.

Top Tips to make hydrangea last when cut from the garden

  • Bring a bucket of water into the garden with you before cutting.
  • Cut the hydrangea bloom as long as possible and immediately place the stem into your bucket of water. While keeping the hydrangea stem submerged, cut the stem to your desired length on a 45 degree angle.
  • When you have your cut hydrangea blooms indoors, boil some water and add it to a heat safe container. Place your stems into the hot water and allow them to sit until the water comes to room temp.
  • Add fresh water to a well cleaned vase and arrange your hydrangea blooms.
White hydrangeas soaking in water in a sink.

How to Revive Wilted Hydrangeas

Step one:

Remove extra leaves from the stem, especially any that will fall below the water line. Hydrangea leaves can steal moisture from the blooms, so it’s best to remove most of them, but I do always like to leave a few for the contrast of color!

Step two:

Fill up your sink with several inches of lukewarm water and submerge the entire bloom head and stem into the water. Leave submerged for an hour or more, then gently pat the blooms dry. Hydrangeas are one of the only flowers that absorb water through their petals. Fanscinating, am I right?!

Step three:

If you have plump, happy hydrangeas at this point you can cut the stems at a 45 degree angle while submerged under water and add back to your vase with fresh water. If they could use a little extra perking up, boil some water and dip the cut stems into the water for a couple of minute before trimming and adding back to the vase.

Step 4:

Maintain your blooms by adding fresh water daily, misting the blooms with water daily (remember how much they LOVE water!), and trimming the stems by just a 1/2 inch every few days. If they start looking a little sad, you can always try perking them back up again using the sink soaking method, or dipping the stems in boiling water again. I have been able to bring a set of hydrangeas back from the brink a few times with these methods. Eventually it won’t work anymore, but it really does extend their beauty!

Why Does Hot Water Help Your Wilting Hydrangea?

I know that you’re thinking scalding water would just cause damage right?, but with hydrangeas it has the opposite effect. So why does boiling the water help the flowers perk up instead of wilt?

Hydrangea stems have a sticky sap inside that clogs up and keeps them from receiving water. If the sap gets too clogged, it actually blocks water from traveling up the stems and it never even reaches the blooms. The boiling water helps to unclog that sap, so that water can reach the blooms again!

White hydrangeas soaking in water in a sink.

Tips to Preserve Your Hydrangeas Longer

  • Refrigerate: I’ll often do this when I’m getting ready to entertain! I’ll use the boiling water technique, then cut the stems at a 45 degree angle and place in a vase with water. Refrigerate them until as close to the event as possible and arrange as desired.
  • Make your own flower food: Mix 1 quart water, 2 tablespoons lemon juice, 1 tablespoon sugar, and 1/2 teaspoon of bleach
  • Tricks that I have heard of, but never tried: adding a penny to your vase, or adding vodka or club soda to the water. Have you tried any of these?
  • The boiling water method is also great when you first bring your hydrangeas home or cut them off the plant.  You can give your stems an initial dip in boiling water even before you add them to your vase to keep the water flowing up the stem. Just cut the ends, place the stems in boiling hot water for 30 seconds to a minute and transfer them into your container filled with luke warm water.
Vase of freshly revived white hydrangeas.

Shop this post:

  • Vase

Content may contain affiliate links. When you shop the links, I may receive a small commission at no cost to you. Thanks for supporting my small business.

Flowers & Gardening, Home and Garden

Basic Sourdough Bread Recipe

Jan 10, 2024 · Leave a Comment

Jump to Recipe

Just a few years ago I made it a goal of mine to learn how to make sourdough. Let’s be honest, I absolutely love Panera Bread (primarily with a warm bowl of Broccoli Cheddar soup served with their sourdough) and I wanted to create something just as enjoyable from home. This recipe is exactly that and I have family raving about every loaf I make!

Everyone’s journey with sourdough looks a little different, and mine is no exception. I’ve had a few very neglected starters that unfortunately had to be tossed. I’ve had loaves that did NOT turn out well. But after much trial and error and a bit more consistency in caring for my starter, I have beautiful sourdough each time I bake!

What Is Sourdough?

In a nutshell, sourdough is slow-fermented bread that doesn’t require commercial yeast in order to rise. Instead, sourdough bread is made with a live fermented culture that acts as a natural leavening agent.

Well known for its its tangy and slighty sour flavor, chewy texture, and crackly crust it makes the most delicious side to a creamy soup, creates the most perfect sandwich, and is ideal paired with a seasoned dipping oil. Not only does it taste amazing, but the naturally occurring acids and long fermentation help to break down the gluten, making it more digestible and easy for the body to absorb!

Sourdough loaf on a cutting board that has been sliced open.

Sourdough Starter

While you can certainly create a sourdough starter on your own, I decided to purchase my starter from Sunrise Flour Mill and have had amazing results with it. My own basic sourdough recipe is a modified version of their recipe, with more specific measurments, tweeks made, and tips for a better outcome based on my own experience with baking sourdough.

How to Feed Sourdough Starter

When just maintaining my starter (aka not planning to bake the next day) I first measure the amount of starter in grams. I calculate the amount of flour and water needed by dividing the total grams of starter by 2 and adding that calculated amount of each flour and water. Starter: Flour: Water or 2:1:1 or 100g:50g:50g.

If I plan to bake the following day I will use the same amounts of starter, flour, and water (1:1:1) Typically I feed around 175g of starter with 175g of flour and 175g of water. After adding 270g of active starter to my dough when mixing, I then feed the remaining starter as usual (2:1:1).

Closeup look at the texture of the sliced sourdough bread loaf on a cutting board.

When is My Starter Ready To Use?

Your stater is ready to use when it becomes bubbly and doubles in size.

This can take anywhere from just a few hours up to 12 hours or more depending on the temperature and the condition of your starter. It may take a few feedings to figure out what works best in your environment.

I have personally found that it works well to feed my starter the night before I plan to mix the dough. I feed it just before going to bed and by morning it is bubbly and ready to go!

Sourdough Bread Ingredients

  • Active sourdough starter
  • Bread flour – I personally use King Arthur bread flour
  • Water
  • Sea Salt
  • Rice flour – I use Bob’s Red Mill rice flour to dust the bannetons

How To Measure Your Ingredients

I use a kitchen scale for measuring each ingredient added to the dough as I go through the mixing process. I begin by placing my scale on a solid surface and turning it on. Set the bowl being used for mixing on the scale then zero out the scale by holding down “zero” or “tare” until the scale shows 0grams while the bowl is still sitting on the scale. I first measure out the bread four, then zero out the scale before adding the water. I then do the same for each step – place the bowl with flour and water after autolyse on the scale, zero out then add sea salt. Zero out again before adding your active starter.

Why I Use Rice Flour For Dusting The Proofing Baskets

Using rice flour to dust the bannetons has been the most helpful trick I’ve found on my sourdough journey. I recommend dusting the bread baskets with rice flour because it is gluten-free and doesn’t absorb moisture in the same way that all purpose or bread flour does. I find that with rice flour my dough releases perfectly when I turn it out onto parchment paper for scoring prior to the bake. When using all purpose flour I found that my dough tore as it released. If you do not have rice flour available, gluten-free flour would make a good substitution.

Slice of sourdough bread.

Equipment Needed To Make Sourdough

  • Danish Dough Hook
  • Banneton Proofing Baskets, Bread Lame, and Dough Scraper – here is a great sourdough starter set that is very similar to what I started with and currently use
  • Kitchen Scale
  • Dutch Oven
  • Jar for your starter – I have a set of these jars and have 2 dedicated to starters (one active starter and an extra in case I need to transfer for cleaning).

Steps in Making Your Sourdough Bread

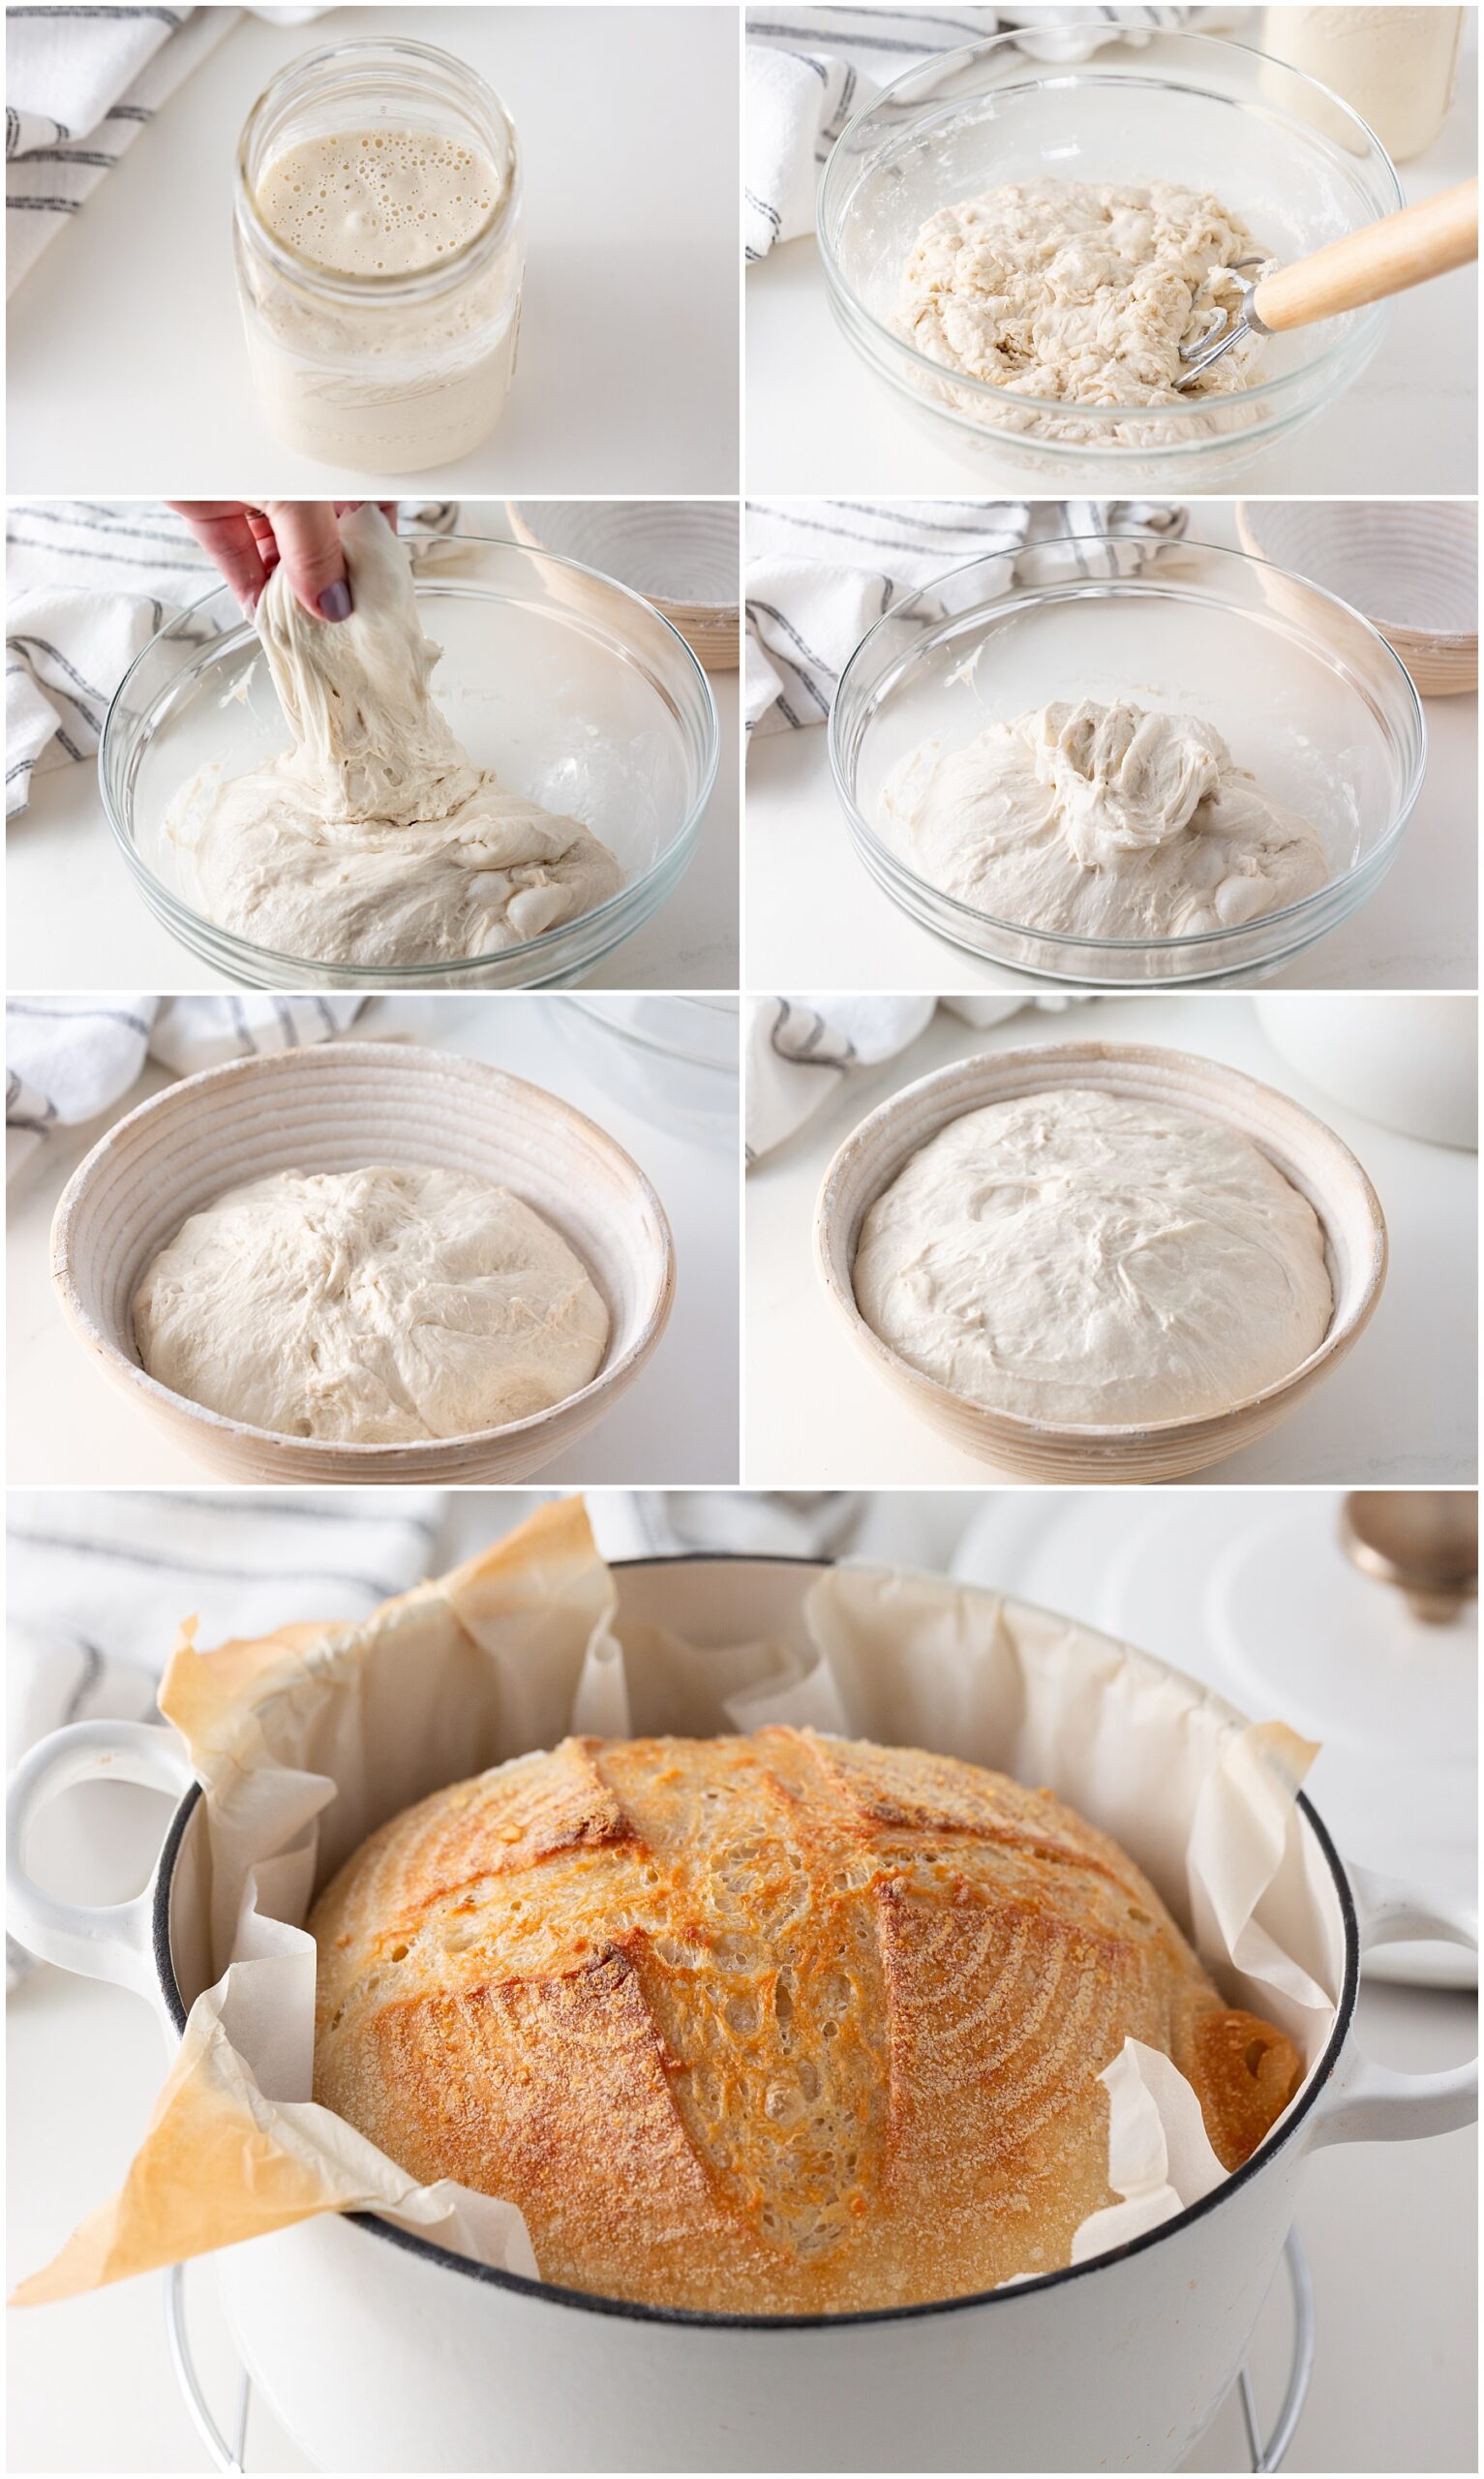
The full process of making sourdough as shown through pictures.

Basic Sourdough Bread Recipe

Print Recipe Pin Recipe
Prep Time 1 hour hr
Cook Time 35 minutes mins
Resting Time 23 hours hrs
Servings 2 loaves

Ingredients
  

  • 1000 grams bread flour (I use King Arthur bread flour)
  • 700-710 grams water
  • 1 tablespoon sea salt
  • 270 grams active sourdough starter
  • rice flour for dusting the bread proofing baskets/bannetons (I use Bob's Red Mill rice flour)

Instructions
 

  • Combine the bread flour, water, and salt in a large mixing bowl. Mix with a danish dough hook or fork until it becomes a shaggy dough. Cover for 1 hour for autolyse (autolyse is when the mixture of flour and water is given a period of time to rest before bulk fermentation).
  • Add the sourdough starter and mix thoroughly by hand. It will take several minutes to fully incorporate the starter. The dough is ready when it is smooth but still sticky to the touch.
  • Once mixed, place into a large clean mixing bowl and cover until almost doubled in size. This will take several hours (I usually give mine around 3-4 hours or more depending on the temperature in my home during a given season, but your time may vary). You can speed up the process a bit by placing the bowl on top of a heating pad set to the lowest setting for this bulk fermentation period.
  • Once it has doubled in size, you can begin the stretch and fold process. Grab one side of the dough and fold it back onto itself. Rotate the bowl by a quarter turn and repeat. Repeat twice more, for a total of 4 stretch and folds. Cover and let rest for 30 minutes. Note: it can help to wet your hands with water before doing each stretch and fold so that the dough doesn't stick to your hands as much.
  • Repeat the previous step every 30 minutes. Do this 3 to 4 times (for a total of 4-5 total stretch and folds). The dough gets stonger with each stretch and fold.
  • Prepare 2 bannetons by first lightly saturating the inside of the basket with water (note: I do not use the linen liner cloth). Then generously dust the basket with rice flour until all areas are well covered with the flour.
  • After the final stretch and fold, divide the dough into 2 equal portions on a lightly floured surface. Shape the dough and place into the prepared bannetons using your dough scraper as needed. Cover and place into the refrigerator overnight.
  • In the morning, remove the dough from the refrigerator and set on the counter while preheating the oven. Place a dutch oven (lid and all) into the oven and then begin preheating to 450°F. Once the oven has reached 450°F, continue preheat for an additional 30 minutes to allow the dutch oven to fully heat prior to baking.
  • Turn out the first banneton of dough onto a large square of parchment paper. Score the sourdough with a bread lame. Remove the dutch oven from the oven and lift the dough into the dutch oven using the parchment paper. Cover with lid and return to the oven.
  • Bake for a total of 35 minutes. Keep the dutch oven covered for the first 15 minutes, then remove lid for for the remaining time (leave the lid somewhere within the oven to continure heating for the second loaf).
  • Remove the sourdough from the oven and let cool fully on a cooling rack.
  • Repeat steps 9-11 for the second loaf.

Other Recipes To Pair With Fresh Sourdough

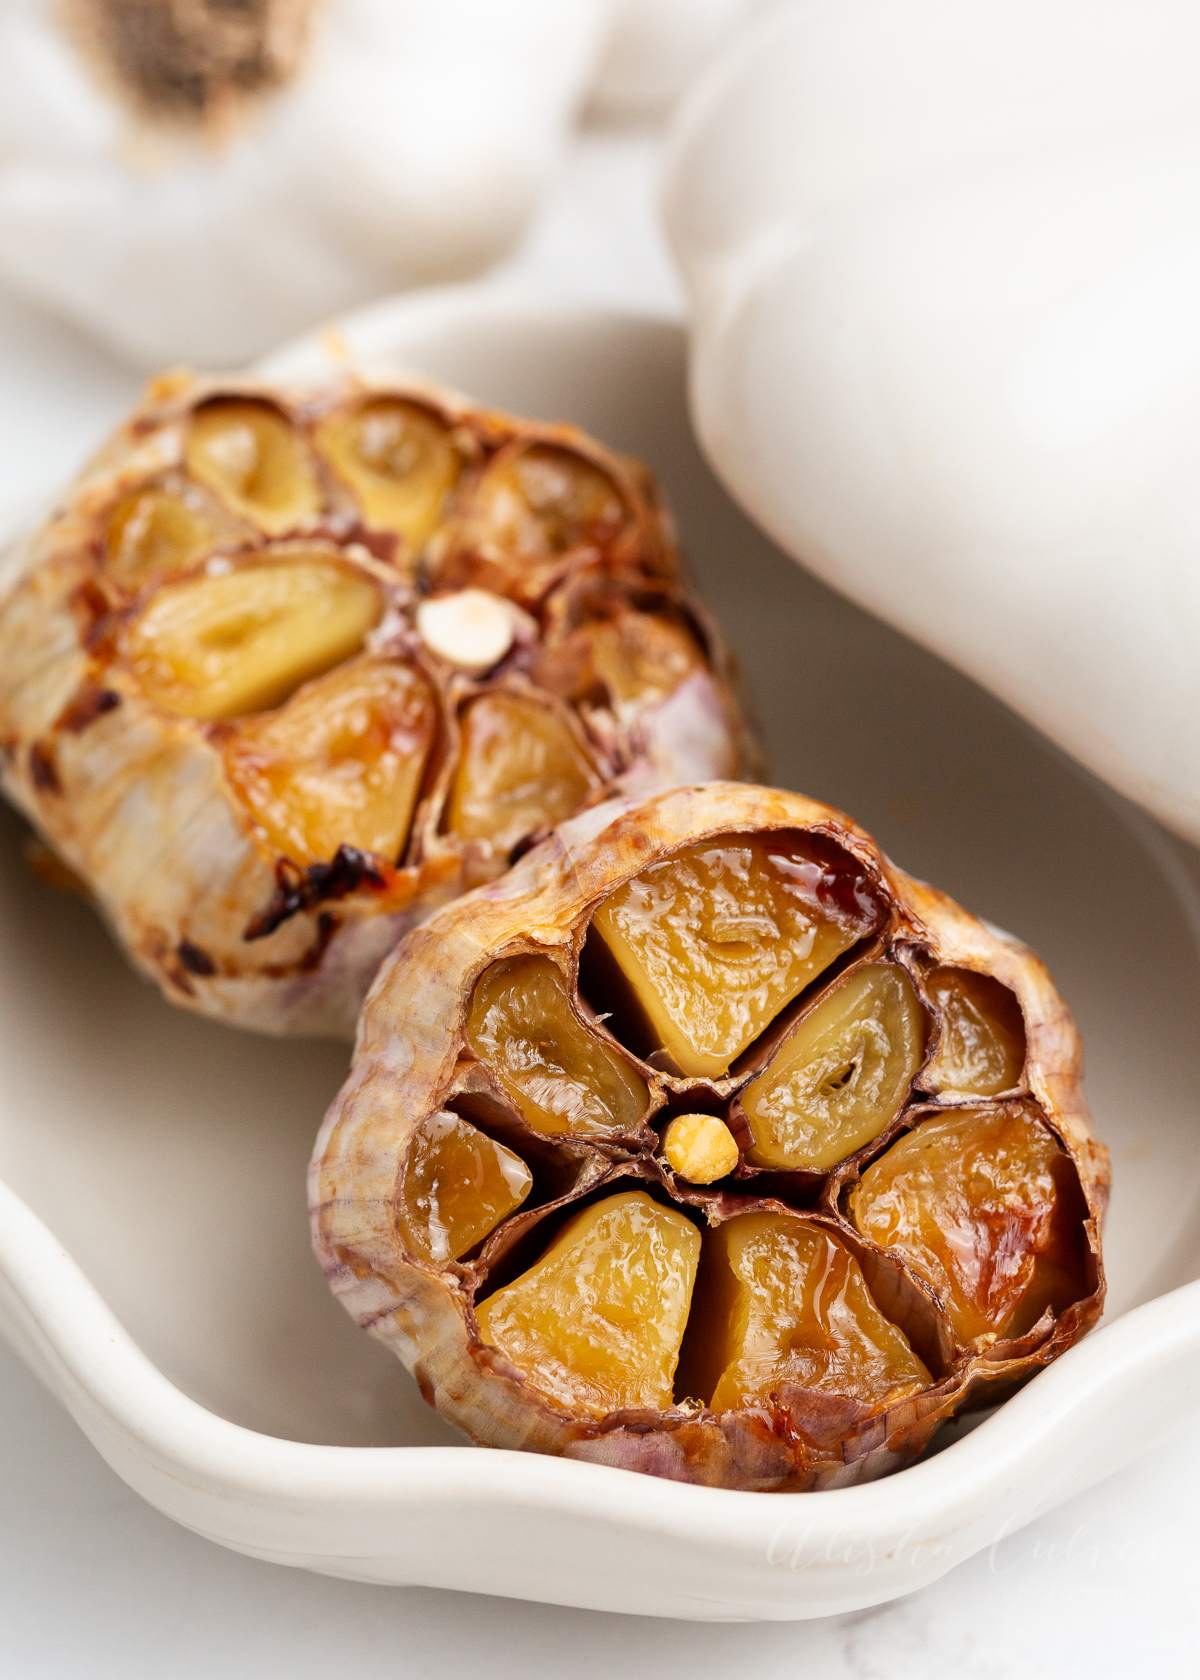
  • Roasted Garlic
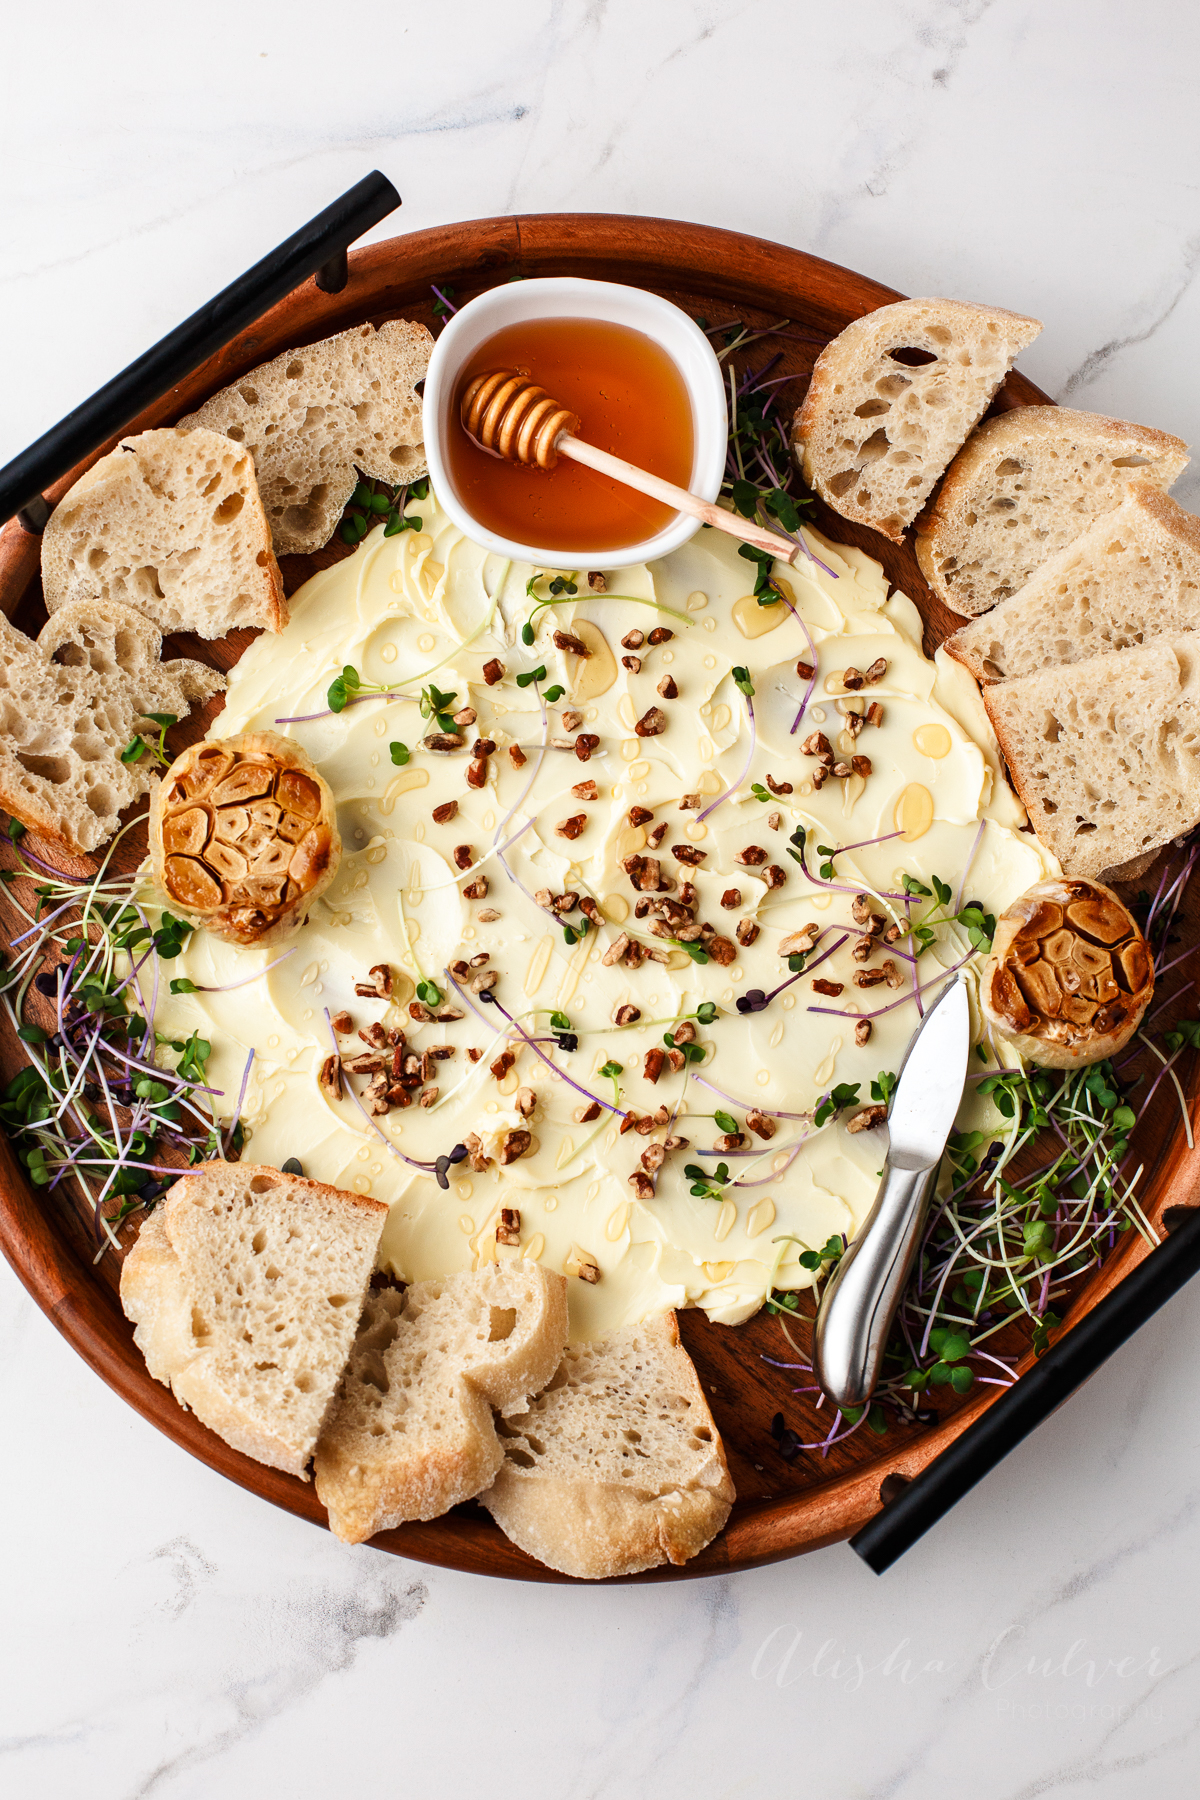
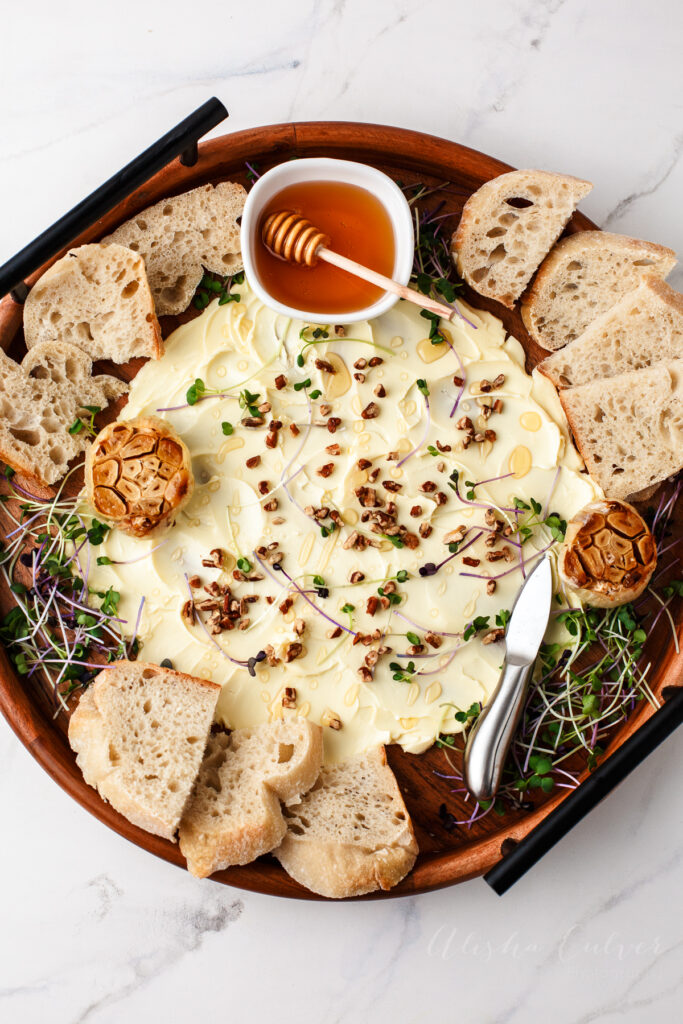
  • Butter Board

Let me know in the comments or leave a review if you make and enjoy this sourdough recipe as much as our family does!

*Affiliate links have been used within this post

Breads, Sourdough

Advent Calendar

Nov 19, 2023 · Leave a Comment

All of the excitement of Christmas is nearly upon us, and the anticipation of Christmas day always brings me so much joy as I watch our daughters enjoy all that the season offers. Tradition and advent, as a daily celebration and preparation of our hearts leading up to Christmas Day, plays such a large part of Christmas in our home. I love that when asked about past Christmases, the majority of their memories are not about receiving but instead about giving and the family time and memories made together through adent. I’m excited to share some of our family’s traditions!

White wooden advent calendar with drawers.

Advent Calendar Activities

As I begin my holiday preparation for December, I print out a blank calendar for the month and mark down all pre-planned occasions. These are typically events that I have pre-purchased tickets for or that already have a scheduled date and time, and they become the advent activities for those days. From there, I sprinkle in other smaller activities or gifts that I know our daughters will love leading up to Christmas day! Some of our favorite advent activities include:

  • Make cinnamon ornaments
  • Candy cane hunt (hide candy canes throughout the house and see who can find the most….this is absolutely one of our girls favorite activities!)
  • Decorate gingerbread houses (I’m strongly considering this reusable gingerbread house this year. While it won’t have the amazing smell of homemade, I always have to consider some convenience when planning.)
  • Christmas donuts while making a Christmas wish list
  • Go ice skating
  • Campout by the Christmas tree
  • String popcorn
  • Start a new Christmas puzzle (we love Kinkade Christmas puzzles like this one…they are so beautiful when finished!….and the movie ‘Christmas Vacation’ is a family tradition, so this was a favorite find a couple of years ago! It’s so nice to then have an activity for days home from school due to snow days.)
  • Write a letter to santa
  • Caroling at a local nursing home
  • Deliver treats to a neighbor
  • Christmas movie with themed cookies or food
  • Family Christmas charades night (create your own or search for free Christmas charade printables online)
  • Christmas music dance party
  • Take a drive to enjoy Christmas lights (our tradition has been to get Starbucks and take along Christmas puppy chow)
  • Attend the Nutcracker Ballet
  • Make a Christmas card for a soldier or teacher
  • Christmas themed breakfast (ours using entails haivng the cutest santa pancakes)
  • Attend ‘A Christmas Carol’
  • Host a cookie exchange
  • Make Christmas cookies (one year we gifted each of our girls an apron for this activity, but small cookie cutters might be a fun idea for this day too!)
  • Receive Christmas socks
  • Go to a living nativity
  • Make treats for a family pet (we even use a bone shaped cookie cutter for our sweet pup Chloe)
  • Gather a basket of old toys to donate
  • Pick out a new ornament and have an ornament exchange (my husband and I have actually exchanged ornaments since the year we were engaged….he knows my love of vintage inspired glass ornaments and I find ornaments for his favorite sports teams that go on a ‘sports themed’ tree in his home office.)
  • Make hot chocolate or hot cocoa bombs
  • Christmas scavenger hunt (you can find free printables online for this activity)
  • Make a homemade gift for siblings
  • Give back to others (we decide as a family that day what charity we want to give to)
  • Make birdseed ornaments and hang them outside
  • Read a Christmas book together
  • Write Christmas wishes to hang on the tree
  • Local events (for us that includes a magic Christmas tree festival, grinch photo night, the candy cane crib light display, warm springs ranch, a living windows festival, grant’s farm light display, symphony of toys, & a winter wonderland light display)

I write out each activity on a gift tag and add them to the advent calendar, easily able to move and adjust the activities as our schedule allows or changes. While we always add in a few bigger events that I will cherish memories of, our daughters truly love, remember, and request the smaller activities yearly! I know that in years to come they will always reminisce about the fun that we had in counting down to Christmas day!

White wooden advent calendar with drawers.

Other Advent Calendar Ideas

There are other thoughtful ideas that we have tried and some that we still partially incorporate into our advent tradition. I love the idea of random acts of kidness for each day of the month, but ultimately this is something we try to instill in our daughters every single day of the year (being kind and doing kind things for others year round). It would be a lovely way to welcome in the holidays, as it is of course the season of giving!

When our daughters were younger, I found a fantastic printable that told the story of the birth of Christ. Each day they pulled out a piece of paper from the advent calendar that told a small part of the story and included a Bible verse. It was a great way to introduce and tell the story of Christmas to young children.

Children (and let’s by honest, adults too) love counting down with chocolate, so I do sprinkle in Hershey Kisses throughout the month! It’s a fun little treat without buying the more expensive chocolate advent calendars.

Books Books are a great option too. This is not one we have personally participated in, but I think it is a wonderful idea when building a child’s library. Wrap a book for each day and let them pull from the stack and read it together!

White wooden advent calendar with drawers.

However you may choose to prepare for Christmas through advent, I hope you enjoy and make wonderful memories! I love this tradition and the memories that my family is making each and every year.

Link for our advent calendar

Other similar calendars include this wooden Christmas advent calendar book or this fold out advent calendar

This post includes affiliate links**

Christmas

Holiday Gift Guides for Everyone on Your List

Nov 15, 2023 · Leave a Comment

Holiday Gift Guides

The most wonderful time of year is right around the corner! Struggling with gift ideas? Here are my Holiday Gift Guides to help you find the perfect gifts for everyone on your list (plus we’re continue to update, so don’t forget to check back):

Holiday gift guide for the tween girl

Holiday gift guide for the coffee lover

Gift Guide for teacher gifts


Gift guide for dad
Gift guide for the hostess

Amazon affiliate links are included in guides**

Gift Guides

Tea Stained Paper for Halloween

Oct 24, 2023 · Leave a Comment

If you are looking for last minute ideas for Halloween decor, this is such a quick and easy project. Not to mention, you’re likely to have everything on hand so it makes for a free project too! We are hosting a Halloween trick-or-treat party this year, so I’ve been finding thrify ways to add a bit of Halloween throughout our house. Tea staining was a simple and easy way to give a basic printable an aged, vintage, and slightly spooky appearance.

Tea stained print of a haunted house.

Here’s a step-by-step tutorial on how I did it:

Materials You’ll Need:

  1. Printed Paper: I used Canva to print out a Halloween scene of my choosing. There are so many fun artwork ideas that you could use. Look for haunted houses, ravens, skeletons, ghosts…all things Halloween!
  2. Tea Bags: I used green tea bags that I already had on hand.
  3. Boiling Water: To steep the tea.
  4. A Container: A shallow dish or a baking sheet works well for this.
  5. Paper Towels or Rags: For blotting and wiping excess tea.
Tea stained print among other Halloween decor.

Step-by-Step Instructions:

  1. Prepare Your Workspace: Start by laying out all your materials. You may want to cover your workspace with newspaper or a plastic tablecloth to protect it from tea stains.
  2. Brew the Tea: Boil water and steep the tea bags. You really only need about 1/2-1 cup for this project. Allow the tea to steep until it’s quite dark, which usually takes around 5-10 minutes. The longer you steep, the darker the stain.
  3. Let the Tea Cool: Allow the tea to cool down slightly.
  4. Prepare Your Paper: Lay your printed piece of paper on a clean baking sheet. I personally liked that results that I achieved with basic printer paper vs a higher quality paper.
  5. Apply the Tea: Use the tea bag to gently wipe across the paper. Start with light strokes to control the level of staining. For a more aged look, you can focus on the edges and corners of the paper. Dabbing the tea bag in a few different areas of the paper will also give increased saturation in those areas.
  6. Blot and Blend: Use a paper towel or rag to blot any excess tea from the paper. You can also use the towel to gently blend the tea stain across the paper for a more even look.
  7. Dry the Paper: Allow the stained paper to air dry naturally.
  8. Inspect and Repeat (if needed): Once the paper is dry, assess the color. If you want it darker, you can repeat the staining process. Just be mindful not to overdo it.
  9. Finish Your Project: After the paper reaches your desired level of staining, simply grab a frame from around the house and hang or incorporate with other Halloween decor.
Tea stained print on an entry table with other Halloween decor.

This tea stained pring could not have been easier to create and added just what I was looking for on our entry table! Next up…staining and hanging a few more down our hallway!

Halloween

Fall Bucket List

Sep 28, 2023 · Leave a Comment

Orange Fall Bucket List printable

Only a few days have passed since the arrival of the first day of fall, and it dawned on me that I have yet to chart the course for the exciting months ahead. A few years ago I began creating a list of all the things and activities we wanted to do each fall with our daughters, friends, and family during what is my absolute favorite season of the year! The kids have always joined in on the planning, making sure to get their top picks on the list each year too! For this busy mom, it has been so helpful to simply pull up a list at the start of the season and pencil in or plan out as many fun things as possible. With the planning done, I can then sit back with my hot cocoa or fall latte, enjoy all the smells, admire the beauty of the change of season, watch my kids delight in all the fall things, and fit in as many spooky movies as possible.

From our list:

  1. Go Apple Picking: Visit an orchard and pick your own apples for baking delicious fall treats.
  2. Visit a Pumpkin Patch: Find the perfect pumpkin for carving or decorating your home. We always head to our local nursery and pick out carving pumpkins, ornamental pumpkins for the front and back porch, and grab a few mums too!
  3. Carve Pumpkins: Host a pumpkin carving night with friends or family and display your creations. I love our Hearth and Hand with Magnolia pumpkin carving kit because the set is well made and looks nice too! You can click here for printable carving patterns or have fun creating some of your own in Canva!
  4. Visit a Corn Maze: Get lost in a corn maze for a fun and challenging adventure! We have yet to take the girls to a large maze, but this is on the list for this fall!
  5. Cozy Movie Nights: Host movie nights with classic fall films and warm beverages. Do this indoors or out! We have an outdoor projector and screen that makes for a fun outdoor evening enjoying the brisk air while sipping warm drinks, making s’mores, and curled up in cozy blankets. If we’re hosting others I will often set up a cute serving cart with popcorn, movie treats, and fun drinks! Don’t forget the string lights and extra candles.
  6. Have a Costume Party: Organize a costume party with friends! Creat a playlist ahead of time for a fun or spooky mood! Award a winning prize for the best costume at the end of the evening.
  7. Have a Bonfire with S’mores
  8. Play in the Leaves
  9. Make a Fall Simmer Pot: Check out my post on creating a fall simmerpot, with free printable tags too, making it a perfect fall gift for a friend!
  10. Sip Hot Cocoa and Hot Apple Cider: Warm up with a mug of hot apple cider, spiced chai tea, or this perfect crockpot hot cocoa.
  11. Make Chili or New Soup Recipe: We love having a chili cookoff and often combine with into a bonfire get-together. Chili and soup have also become our Halloweeen night tradition. We let them simmer through the late afternoon as the kids get into costume, and we prepare to host our annual Halloween trick or treating party. It’s so easy to prepare ahead of time and is a crowd pleaser served with fresh cornbread and homemade sourdough bread.
  12. Decorate for Fall: Deck out your home with fall-themed decorations, such as wreaths, candles, and cozy blankets.
  13. Watch Football
  14. Enjoy a Hayride
  15. Fall Lattes
  16. Make Caramel Apples
  17. B&B or Winery Trip
  18. Bake Fall Treats: Make apple pie, pumpkin bread, or cinnamon rolls to fill your home with delicious aromas.
  19. Take a Scenic Drive
  20. Attend a Craft Fair or Fall Festival: Check out local fall festivals with activities like hayrides, food stalls, and live music.
Orange Fall Bucket List printable.

Grab your free printable here:

Orange Fall Bucket List Printable
Green Fall Bucket list printable.

Grab your free printable here :

Green Fall Bucket List Printable

I hope you enjoy the simplicity of these printables. They fit flawlessly into my minimalistic decor with soft, slightly muted colors. Pro-tip: print and place into a glass frame, then mark off each activity you do with a dry-erase marker…you can use again the following year!

Enjoy the beauty and coziness of the autumn season, friends!

*Affiliate links included

Printables

Pumpkin Bread

Sep 27, 2023 · Leave a Comment

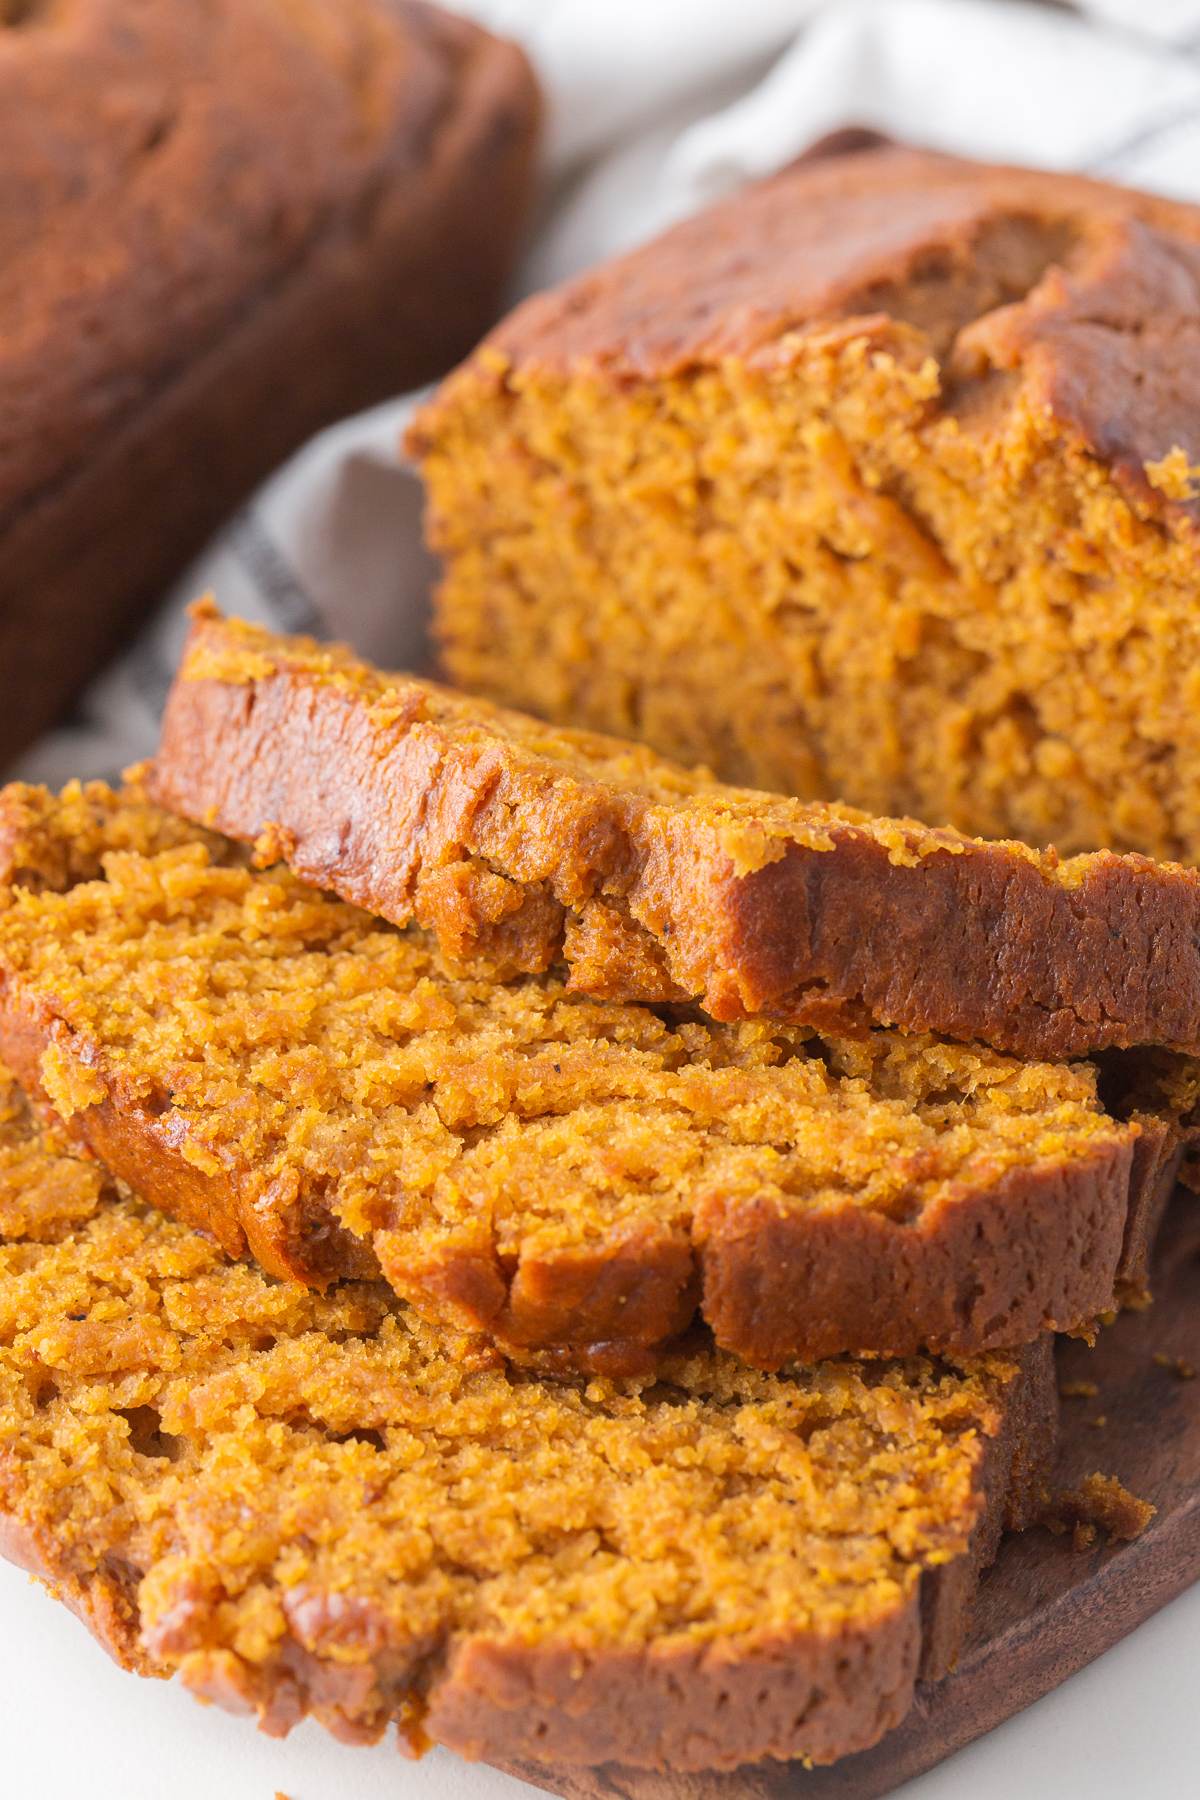
Sliced pumpkin bread on a cutting board.

There is no better way to embrace the cozy spirit of fall than with a slice of homemade pumpkin bread. The aroma of cinnamon, nutmeg, and cloves filling the kitchen…there’s nothing quite like it. And honestly, it just doesn’t feel quite like autumn until I bake my first loaf of this delicious pumpkin bread. This is the best pumpkin bread recipe you will ever try…it’s been used by our whole family for years. I will say, this bread tends to disappear fast, so I strongly suggest doubling the recipe to yield two loaves! These loaves also make such a sweet gift by simply wrapping in parchment paper and tying with a pretty bow!

Slices of pumpkin bread on a cutting board.

Ingredients will need to make this easy pumkin bread recipe:

  • Granulated sugar
  • Canned pumpkin (I use Libby’s 100% pure canned pumpkin)
  • Vegetable oil (I have also substituted canola oil in it’s place and do not feel that it affected the taste)
  • Large eggs
  • All-purpose flour
  • Baking soda
  • Cinnamon
  • Fine sea salt
  • Baking powder
  • Ground nutmeg
  • Ground cloves
Sliced pumpkin bread on a cutting board.

Instructions:

1. Preheat and Prepare:

Preheat your oven to 350°F (175°C) and grease a 9×5-inch loaf pan. Set it aside while you prepare the batter.

2. Combine Wet Ingredients:

In a large bowl, whisk together the sugar, canned pumpkin, vegetable oil, water, and eggs. Set this mixture aside.

3. Combine Dry Ingredients:

In a separate bowl, stir together the flour, baking soda, cinnamon, salt, baking powder, ground nutmeg, and ground cloves.

5. Mix Dry Ingredients with Wet Ingredients:

Gradually add the dry ingredient mixture to the wet ingredients, stirring until combined.

6. Bake to Perfection:

Pour the batter into the greased loaf pan and spread it evenly. Bake in the preheated oven for approximately 65-70 minutes or until a toothpick inserted into the center comes out clean.

7. Cool and Serve:

Allow your pumpkin bread to cool in the pan for about 10 minutes before transferring it to a wire rack to cool completely. Once cooled, slice, serve, and enjoy!

Slices of pumpkin bread on a cutting board.
Sliced pumpkin bread on a cutting board.

Pumpkin Bread

Alisha Culver
Print Recipe Pin Recipe
Cook Time 1 hour hr 5 minutes mins
Cool Time 1 hour hr

Equipment

  • 9×5 inch loaf pan

Ingredients
  

  • 1 1/2 cups granulated sugar
  • 1 1/4 cups canned pumpkin I use Libby's 100% pure canned pumpkin
  • 1/2 cup vegetable oil
  • 1/2 cup water
  • 2 large eggs
  • 1 2/3 cups all-purpose flour
  • 1 tsp baking soda
  • 1 tsp cinnamon
  • 3/4 tsp salt I use fine sea salt
  • 1/2 tsp baking powder
  • 1/2 tsp ground nutmeg
  • 1/4 tsp ground cloves

Instructions
 

  • Preheat the oven to 350°. Grease a 9×5 loaf pan by rubbing vegetable oil across the bottom and up the sides.
  • In a large bowl, add the sugar, canned pumpkin, vegetable oil, water and eggs. Wisk until smooth.
  • In a separate bowl, mix together the flour, baking soda, cinnamon, salt, baking powder, nutmeg, and cloves. Slowly add the dry ingredients to the wet ingredients and mix until combined.
  • Pour the mixture into the prepared loaf pan.
  • Bake 65-70 minutes, or until a toothpick comes out clean.
  • Allow to cool for 10 minutes before removing to a cooling rack to cool completely.

Whether enjoyed as a breakfast treat with a steaming cup of coffee or as a delightful dessert, this homemade pumpkin bread is sure to become a seasonal favorite for you and your loved ones! So, get ready to embrace the joys of autumn, one delicious slice at a time!

Breads, Desserts

Metal Jack-o’-lantern Candleholder

Sep 5, 2023 · Leave a Comment

I had my eye on the cutest Pottery Barn metal jack-o’-lanterns as I began to decorate for fall and Halloween, but I just couldn’t bring myself to spend what it would have cost to buy all three sizes that they offered. I likely would have eventually given in because I truly love Pottery Barn decor, but then happened to come across these at Sam’s Club for less than half the price! Who doesn’t love finding a desired look for less?! I simply couldn’t pass them up and had to share my find with you all here as well.

Black metal jack-o'-lantern candleholders with orange interior

What I love about the Member’s Mark Jack-o-Lanterns:

  • The box of 3 pumpkins includes 3 LED candles
  • You can use a timer option on the candles
  • The pumpkins nest inside each other for easy off-season storage

Features and Details:

  • Midnight black pumpkins with an iron finish and glowing orange interior
  • The large metal jack-o’-lantern measures 12-inches in diameter by 10.5-inches tall
  • The medium-sized pumpkin measures 9.5-inches in diameter by 8.5-inches tall
  • The smallest pumpkin is 7-inches in diameter by 6-inches tall

Grab yours soon because I don’t think they’ll last long this Halloween season!

Black metal jack-o'-lantern candleholders with orange interior

Member’s Mark jack-o-lanterns are available for in-store pickup or for delivery in most areas.

Note: I am not an affiliate, but just really love the look and price of these!

Favorite Looks For Less

Summer Garden Pasta

Aug 16, 2023 · Leave a Comment

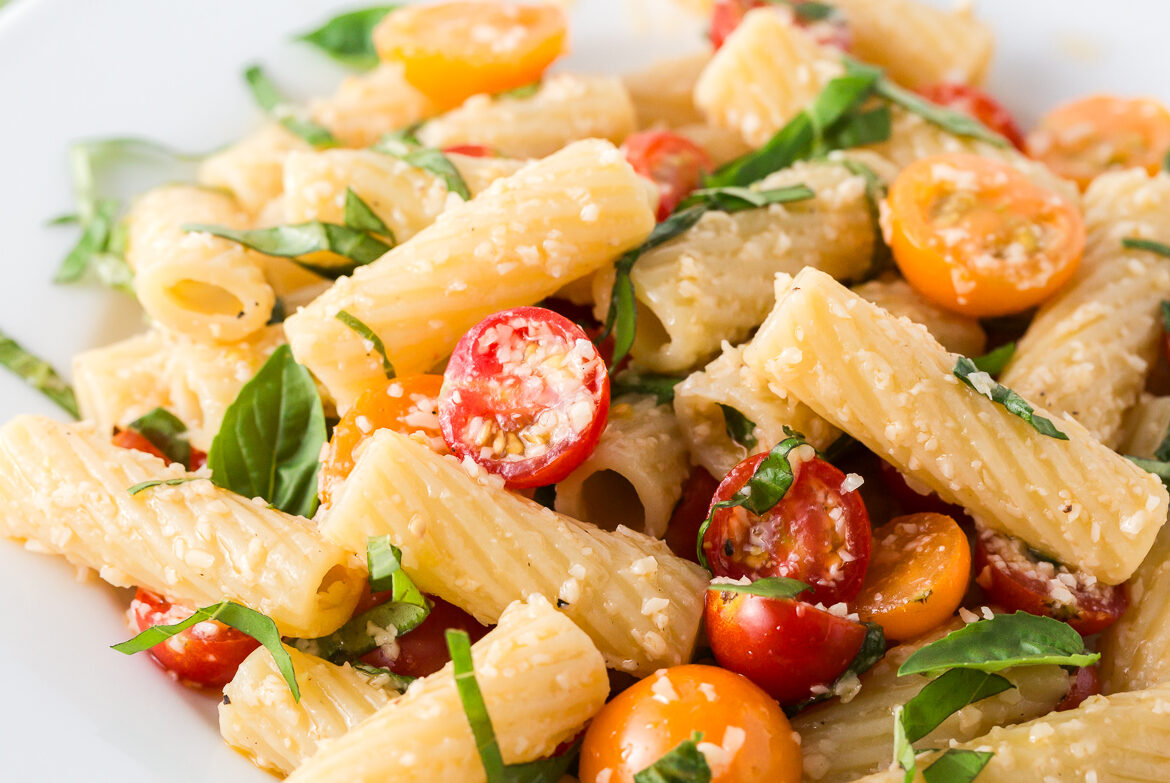
Summer pasta with riggatoni, cherry tomatoes, fresh basil, and parmigiano reggiano.

This year we planted a variety of tomatoes, putting more than 20 plants into our small raised garden bed behind our home. The plants have thrived despite the heat and lack of rain, and are producing better than any past gardening season. So, we have had to come up with creative new ways to use them. We of course shared with nearby family, and our daughters set up a tomato stand one afternoon and enjoyed selling tomatoes to our neighbors. But, mostly we have been creative in the kitchen by coming up with many new easy summer dinners!

So if you’re like me and your garden tomatoes started rippening all at once a few weeks ago and you have so many that you don’t know how to use them all, look no further! You will absolutely love this summer pasta recipe! The marinated tomatoes are chilled then added to the cooked pasta, cooling it all down. Tossed with parmigiano reggiano and topped with fresh basil, it is the perfect light summer meal for a warm summer night.

Summer pasta with rigatoni, fresh basil, garden cherry tomatoes, and parmigiano reggiano.

Basic Ingredients for this Summer Garden Pasta

  • Cherry tomatoes – Using at least a couple of different colors of tomatoes adds a bright summery feel this dish.
  • Olive oil – Using a quality extra virgin olive oil makes all the difference in getting great flavor here. An infused olive oil (like tuscan herb or basil infused oil) would be wonderful in this dish as well!
  • Garlic salt
  • Salt
  • Pepper
  • Fresh basil
  • Rigatoni pasta – I prefer this shape of pasta for this dish because of the way it holds on to the olive oil and cheese when served.
  • Parmigiano Reggiano – I always prefer to grate my own cheese for the most freshness in the final dish.

How to make this easy summer pasta dish

A few hours before you plan to serve dinner, you will want to cut the cherry tomatoes in half and add to a large bowl. Add in the olive oil, garlic salt, salt, and pepper. Thinly slice the basil (saving back a few basil leaves to garnish the dish) and add to the mixture. Stir, then marinate in the refrigerator until ready to serve.

Garden cherry tomatoes marinating with olive oil, fresh basil, and seasoning.

When you’re ready to prepare the dish, bring a large pot of salted water to a boil. Cook the pasta according to the package instructions and drain. Pull the marinating tomatoes from the fridge and add the pasta directly to the bowl. Stir well, then sprinkle in the parmigiano reggiano and toss. Serve immediately garnished with thinly sliced fresh basil.

Summer pasta with rigatoni, fresh basil, garden cherry tomatoes, and parmigiano reggiano.

Variations

Add a bit of minced garlic (omitting the garlic salt)

Add a sprinkle of red pepper flake at the end

Add capers or toss in a few mozzarella pearls

Add grilled chicken or other protein of choice on top

Used a quality infused olive oil for an extra pop of flavor

Summer pasta with rigatoni, fresh basil, garden cherry tomatoes, and parmigiano reggiano.

Other easy summer recipes to make use of your garden tomatoes

  • Fried green tomatoes
  • Avocado BLT
  • BLT flatbread
  • Caprese salad
  • Bruschetta
  • Homemade tomato sauce
Summer pasta with riggatoni, cherry tomatoes, fresh basil, and parmigiano reggiano.

Summer Garden Pasta

Simply Styled and Well Seasoned
Print Recipe Pin Recipe
Prep Time 5 minutes mins
Cook Time 10 minutes mins
Course Main Course
Servings 4

Ingredients
  

  • 4 pints cherry tomatoes sliced in half
  • 2/3 cup extra virgin olive oil
  • 1 1/2 tsp garlic salt
  • salt to taste
  • pepper to taste
  • 25 fresh basil leaves finely sliced, divided
  • 1 box rigatoni pasta
  • 1 cup freshly grated parmigiano reggiano

Instructions
 

  • 2-3 hours prior to serving, slice the cherry tomatoes in half and place in a large bowl. Add olive oil, garlic salt, salt and pepper. Add basil (reserving just enough to garnish the dish later). Stir together and refrigerate until ready to serve.
  • When ready to serve, bring a large pot of salted water to a boil. Cook the pasta according to package instructions and drain.
  • Remove the marinating tomatoes from the fridge and add the pasta directly to the bowl.
  • Sprinkle in the parmigiano reggiano and toss.
  • Serve immediately with fresh basil as garnish. Enjoy!

I hope you enjoy this summer garden pasta with fresh basil and cherry tomatoes as we much as we do!

Easy Dinners

Strawberry Hearts

Jan 31, 2023 · Leave a Comment

Chocolate covered strawberry hearts

The way to my heart on Valentine’s Day is most definitely chocolate covered strawberries! My husband has learned over the years that I don’t expect flowers, a fancy dinner, or jewelry, but I do love receiving Valentine strawberries every year! There is a local candy store where we live that makes the most delicious chocolate strawberries (and that’s where I want my Valentine’s Day gift from), but it’s pretty much a guarantee that at least one batch of homemade strawberries will be made every year and I’m always thinking of ways to creatively make them!

This year I thought it would be fun to create chocolate covered strawberry hearts and then insert some cute picks to represent Cupid’s arrow. I think they turned out great!

Chocolate covered strawberry hearts.

How to make Strawberry Hearts

  • Wash and thoroughly dry your strawberries
  • Hull the strawberries and cut a ‘V’ in the top of each strawberry
  • Dip strawberries in a quality chocolate by leaning to one side and then the other to create a ‘V’ that alligns with the previous cuts made in the strawberry
  • Place on parchment paper and allow the chocolate to set
  • Insert a pick for the ‘arrow’

Association of Chocolate Covered Strawberries with Valentine’s Day

I was reading that, next to chocolate, strawberries are one of the most loved aphrodisiacs, which is why the two were originally paired and why they are simply perfect for Valentine’s Day!

Chocolate covered strawberry hearts with chocolate dipped raspberries.

Other Versions

Of course there are so many fun ways to create chocolate covered strawberries!:

  • Mix up the chocolate! Use milk chocolate, dark chocolate, or white chocolate.
  • Add sprinkles, nuts, coconut, or mini chocolate chips before the chocolate sets
  • Add a drizzle of a different chocolate
  • ‘Soak’ the strawberries in Champagne before allowing to dry and then dip in chocolate

How to Store and Save your Strawberries

Chocolate covered strawberries and best kept in you refrigerator for up to 2 days, but who can possibly resist eating them all before then!

Chocolate covered strawberry hearts

Strawberry Hearts

Simply Styled and Well Seasoned
Print Recipe Pin Recipe
Prep Time 15 minutes mins
Course Dessert

Ingredients
  

  • 16 oz Fresh Strawberries
  • 10 oz Quality Melting Wafers here I used Ghirardelli Dark Chocolate melting wafers
  • Decorative bamboo or drink picks

Instructions
 

  • Wash and thoroughly dry the strawberries.
  • Hull the strawberries and cut a 'V' into the top of each strawberry.
  • Melt the chocolate wafers by microwaving in 30 second increments, stirring each time, until melted and smooth.
  • Dip individual strawberries by tilting to one side and then the other to allign with the previously cut 'V'.
  • Place on parchment paper and allow the chocolate to set.
  • Insert the decorative pick to create a heart shot by Cupid's arrow.

Notes

Pro tips: 
  • Make sure you do not overheat or burn the chocolate and also avoid moisture coming in contact with the melted chocolate as it will cause the chocolate to seize (causing from a fluid state to a stiff, grainy texture)
  • Use a quality chocolate (I love Ghirardelli chocolate because it melts so smoothly)

Desserts

Raspberry Creamsicle

Jan 30, 2023 · Leave a Comment

Raspberry Creamsicle

I have fond memories of going out for burgers, cheese fries, and a large Orange Freeze at a nearby burger joint when I was a kid. My favorite part was always that frosty drink (of course topped with whipped topping and a cherry)! To this day, I still think of that tasty treat when we make homemade smash burgers! We recently made burgers and didn’t have orange sherbet, but did have raspberry sherbet on hand which had me thinking just how delicious a new version might be. This Raspberry Creamsicle (which is like a milkshake, but instead of only using ice cream there is a mix of sherbet and ice cream), absolutely hit the spot.

Raspberry Creamsicle in a fountain glass.

Basic Ingredients in Raspberry Creamsicles

  • Raspberry Sherbet
  • Vanilla Ice Cream
  • Sparkling ICE sparkling water (Lemon Lime Flavored)

I love using the Sparking ICE brand sparkling water for the fizzy effect in this frosty drink because there is zero sugar and only 5 calories per serving. Lemon Lime soda could absolutley be used here!, but we regularly keep sparkling water around and I feel like I’m making a little extra effort to reduce calorie intake on top of the ice cream and sherbet already included in this delicious raspberry treat!

Raspberry Creamsicle in a fountain glass

This Raspberry Creamsicle is a must try recipe for your next burger night in! No need to head out to the local drive in, ice cream parlor, or burger joint when you can whip this frosty raspberry treat up in a matter of minutes!

Raspberry Creamsicle

Simply Styled and Well Seasoned
Print Recipe
Prep Time 5 minutes mins
Course Drinks

Equipment

  • Blender

Ingredients
  

  • 3 scoops Raspberry Sherbet
  • 1 scoop Vanilla Ice Cream
  • 1 cup Lemon Lime Sparkling Water such as Sparkling ICE brand sparkling water, or your choice of Lemon Lime soda
  • Ice Cubes 2-3 large cubes, or a small handful
  • Whipped Topping optional
  • Fresh Raspberries for garnish optional

Instructions
 

  • Add the raspberry sherbet, vanilla ice cream, lemon lime sparkling water, and ice to a blender.
  • Blend ingredients until smooth.
  • Pour into a glass and top with whipped topping and fresh raspberries if desired.

Our other must try Raspberry Drinks:

Raspberry Champagne Float

Drinks

Raspberry Champagne Float

Jan 8, 2023 · Leave a Comment

If you’re looking for a simple yet beautiful drink to add to your next celebration, this is it! With just 2 ingredients this cocktail is perfect for your New Year’s Eve celebration, Girls’ Night In, Galentines, or Bridal Shower. It would even make for a stunning drink at a Baby Shower (by simply substituting the bubbly with a Sparkling White Grape Juice for the mom to be)!

Raspberry Champagne Float in a stemmed cocktail glass.

Basic Ingredients for this champagne cocktail

  • Rasberry Sherbet
  • Your favorite champagne or sparkling wine (or a sparkling white grape juice for a delicious mocktail)

It’s arguable that this cocktail could also be considered a dessert! Pro tip: Have spoons ready to serve along with this champagne float and your guests will thank you as they enjoy an occasional bite of sherbet while sipping their festive bubbly drink. Use some lovely stemmed cocktail glasses (I served mine in these stunning glasses that I found on clearance at Hobby Lobby last Spring) and display on a drink tray. Have fresh raspberries on hand to add on top, or go an extra step and serve with champagne raspberries (raspberries that have been soaked in champagne and a healthy splash of vodka for at least an hour). With the later, you’ll have guests eating the raspberries all on their own!

Raspberry Champagne Float in a stemmed cocktail glass.

Sparkling Wine Vs Champagne

In doing a little research of my own I learned that all Champagne is sparkling wine, but not all sparkling wine is Champagne! Sparkling wine can only be called Champagne if it originates from the region of Champagne, France. The sparkling quality comes from the carbon dioxide content that can be created by a few different methods, and while there are sparkling red wines most are white or rose. In my Raspberry Champagne Floats I prefer a dry white sparkling wine (like a Brut) because I think it pairs well with the sweetness of the sherbet. White, rose, dry, sweet….the choice is yours! This drink is easily customizable based on your preferences.

Different Variations/Fun ideas

  • Use Lemon Sherbet with a sweeter sparking wine and serve with a lemon slice or lemon twist
  • Serve Rainbow Sherbet with a sparkling white grape juice or lemon lime soda for a fun mocktail at a kids birthday party (I’m thinking unicorn or mermaid themed party!) Sparkling ICE (which is a sparkling water) would also work well here and they offer a lemon lime flavor.
  • Switch out the Sherbet for Sorbet for a dairy free option

Raspberry Champagne Float

Simply Styled and Well Seasoned
Print Recipe Pin Recipe
Prep Time 5 minutes mins
Course Drinks

Ingredients
  

  • 1-2 scoops raspberry sherbet
  • Champagne or sparkling wine
  • Fresh raspberries for garnish optional

Instructions
 

  • Add 1-2 scoops of raspberry sherbet to a cocktail glass.
  • Slowly pour Champagne or sparkling wine over the sherbet.
  • Garnish with fresh raspberries, if you choose.
  • Enjoy!

Drinks

Butter Board

Oct 27, 2022 · Leave a Comment

I just had to try out the viral TikTok butter board trend recently…..and I kind of love it!! The options are endless with these boards by simply switching up the toppings and garnishes or by switching out the butter for other spreadable cheeses. Serve it up with your favorite bread and a butter or cheese knife…and no double dipping allowed!

I’m quite the fan of a beautiful charcuterie board (traditional or super creative) and feel as though they are always a huge hit at any get together. If we host a family holiday event or dinner party, you can rest assured that there will be some version of a charcuterie board. I can’t wait to display this new butter charcuterie board version this year around the holidays!

Basic Ingredients for this Board

  • Butter – Salted or Unsalted depending on preference, just adjust adding additional flakey salt based on your choice
  • Chopped pecans – you can use another nut of choice (pine nuts, toasted almonds, or walnuts would be a delicious addition to a butter board)
  • Honey
  • Microgreens – there are a varitey of microgreen options that can typically be found near the packaged salad mixes in most grocery stores
  • Roasted Garlic
  • Serve with a crusty artisan bread, crostinis, or crackers – I love serving it with my homemade Sourdough recipe that I will be sharing soon

Other Butter Board Ideas

  • Use a flavored or herb butter
  • Fresh herbs of your choice – I love using fresh herbs from the garden, but dried herbs will work well too! Think rosemary, chives, oregano, thyme, etc.
  • Mix it up by using a whipped cream cheese, goat cheese, or even hummus instead of butter.
  • Fruits or Jams – dried cranberries would be so perfect paried with walnuts and a herb infused honey
  • Seeds for texture – think pepitas or sesame seeds (I’m planning a sweet potato hummus board with a mix pepitas, fried black eyed peas, and pumpkin oil for Thanksgiving)
  • Dried meats

What to Serve With a Butter Board

  • Artisan Crackers
  • Warm Crusty Bread
  • Bagels -perfect for a breakfast board version with whipped cream cheese and toppings
  • Naan bread – fantastic for a hummus board verson of a butter board
  • Cookies or graham crackers for a sweet version of the board

Butter Board Close Up

Butter Board

Butter Boards are perfect for serving at your next dinner party or gathering!
Print Recipe Pin Recipe
Prep Time 10 minutes mins
Total Time 10 minutes mins
Course Appetizer
Servings 8

Equipment

  • Serving Board

Ingredients
  

  • 12 Tbsp Softened Butter, choice or salted or unsalted
  • Honey, for drizzling
  • Pecans, chopped
  • Microgreens
  • Flakey Salt, if using unsalted butter
  • Roasted Garlic

Instructions
 

  • Spread the softened butter on a serving board and use a knife to create texture /pattern.
  • Add your choice of toppings. Here we used honey, chopped pecans, roasted garlic, and microgreens.
  • Serve with your favorite artisan bread or crackers.

Links: Sourdough, Roasted Garlic

Appetizers

Roasted Garlic

Oct 18, 2022 · Leave a Comment

Whole Rosted Garlic is one of my favorite things to make in the oven! It comes out carmelized with a sweet, nutty flavor that is just quite simply so delicious. It is creamy and spreadable and can add an extra depth of flavor to your next dish. So simple to make, yet so over the top tasty!

Basic Ingredients for this Roasted Garlic Recipe

  • A Large Head of Garlic
  • Olive Oil
  • Salt to taste – I enjoy using a flaky salt such as Maldon Sea Salt, but regular table salt works great too

How to Make Roasted Garlic

  • Preheat your oven to 350 degrees Fahrenheit.
  • Peal off any loose layers from the head of garlic. Be sure to leave at least the last layer in order to hold the garlic cloves all together.
  • Cut the top 1/4th of the garlic head off to expose the garlic cloves.
  • Place the head of garlic inside your galic roaster cut side facing up. (I have had my Longaberger pottery garlic roaster for several years that I love, but you can find other options online by searching garlic roasters or garlic bakers, OR you can simply use aluminum foil to wrap and seal around the garlic.)
  • Liberally drizzle olive oil on top of the garlic and sprinkle with salt.
  • Bake for 45 minutes until the garlic is a beautiful carmalized brown color.
  • Allow to cool to the touch and then squeeze from the uncut side. Or using a small fork you can remove the cloves from the head of garlic.

What does Whole Roasted Garlic Taste Like?

Whole Roasted Garlic has a sweet, nutty flavor that it gets from caramelizing in the oven as it roasts. It has a milder flavor than raw garlic, and looses the ‘bite’ that raw garlic has. As it roasts it it becomes soft, creamy, and spreadable. It is absolutley delicious!

What Can Roasted Garlic Be Used For?

If you’re anything like me, you might choose to simply eat the fresh roasted garlic all on it’s own! However, there are endless options! Make a Roasted Garlic Cheese Bread, Roasted Garlic Butter, spread it directly on baguette slices or fresh sourdough, add to mashed potatoes or other casseroles and dishes, display on a butter board, or even add it to a pizza!

Other Ways to Make Roasted Garlic

  • Wrap in aluminum foil and bake at 350 degrees Fahrenheit for 45 minutes
  • Air Fryer Roasted Garlic – Preheat airfryer to 380F and wrap in aluminum. Airfry for 16-20 minutes until carmelized.
  • Roast it in a Muffin Tin – Place the head of garlic in the muffin holes and cover with aluminum foil.

How to Store Roasted Garlic

You can save Roasted Garlic in an airtight container for up to 3 days in the refrigerator. Or, to freeze I like to smash it with a fork and mold in a covered ice cube tray. I then simply pop a cube out of the freezer as needed. It will store in the freezer for up to 2-3 months.

Roasted Garlic

Roasted Garlic

Simply Styled and Well Seasoned
Print Recipe Pin Recipe
Prep Time 5 minutes mins
Cook Time 45 minutes mins
Course Appetizer
Servings 1

Ingredients
  

  • 1 Head of Garlic
  • Olive Oil
  • Flaky Sea Salt I like to use Maldon Sea Salt, but table salt works well too

Instructions
 

  • Preheat your oven to 350 degrees Fahrenheit.
  • Peal off any loose layers from the head of garlic. Be sure to leave at least the last layer in order to hold the garlic cloves all together.
  • Cut the top 1/4th of the garlic head off to expose the garlic cloves.
  • Place the head of garlic inside your galic roaster or aluminum foil cut side facing up. 
  • Liberally drizzle olive oil on top of the garlic and sprinkle with salt.
  • Bake for 45 minutes until the garlic is a beautiful carmalized brown color.
  • Allow to cool to the touch and then squeeze from the uncut side. Or using a small fork you can remove the cloves from the head of garlic.

Appetizers

Copyright © 2026 SIMPLY STYLED and WELL SEASONED on the Cravings Pro Theme